Hey friends and family (and total strangers who I’m referring to as friends because on if you’re here then you are now a friend), we have moved our website to a new platform.
WordPress is a great platform that can do a ton of stuff but I’ve always struggled a little to get it and I felt that some other platforms were more user friendly,
I found a template that I really liked on squarespace.
We wanted to start our online store and on our new site we have Adam’s minimalist sandals for sale!
Thanks for following along and I hope you follow us over at our new spot too!
You can also find us on instagram @DeliberateLifeBus
Bunk beds are notorious for being hard to make up and our bunks in the bus are no exception. Actually, ours may be worse. We built the bunks in the skoolie to be about 5″ narrower than standard mattresses in order to have a wider hallway and bathroom. I mean, does a 50 pound person really need 38″ of space? Does an adult even need that? Another thing that causes struggle when making up the beds is that the bunks are partially enclosed making it tough to get back in the corner of the top bunk, and because the space is so small, I can’t really get up on the top bunk without at least partially lying down!
Before: Blankets dangling out of the un-makeable bed
Struggling with putting the sheets on, tucking them around, putting another sheet on, tucking it around, getting a blanket tucked in the bottom was a challenge and then there was no way the kids were going to be able to make their beds look made. It involved too much tucking in a tight space. So I asked around for ideas. A lot of people recommended Beddy’s zippered bedding, including another family who also lived in a vehicle with narrow mattresses.
I had seen these before and loved the idea but the price tag was hard to swallow. At around $250 for a twin bed, that’s a lot of money to sink into bedding. Especially if like me, you have traditionally purchased the cheapest sheets you could find. So how did I justify it? Well, all their bedding was old and gross and I really needed to replace it so I was about to drop some money on new sheets and blankets. And I knew I would be just as frustrated and still out the money on the cheap stuff I would have bought. So after much deliberation and trying to justify them to myself and to Adam, I just dove in.
Dig in!
Get cozy!
Minky!
HOORAY! They are awesome and so worth it!
Look at my neat and tidy hallway!
One piece
This is what makes Beddy’s so easy for me. It’s like a fitted sheet that someone sewed zippers to and then zipped half a sleeping bag onto. So I take this big fluffy ball, pull it over the mattress. Yes, there is still tucking and tugging involved in the weirdly sized, enclosed space I’ve created but then I’m done. The bed is totally made. No more layers of sheets and blankets to tuck. Just ONE.
They also have a lot of elastic stretch around the entire edge unlike some fitted sheets that only have the elastic on the corners. This means that they fit a wide variety of mattress sizes. They are still a little big for our thin, narrow mattresses but with all the elastic, they are staying in place surprisingly well. On their website, Beddy’s says they fit mattresses up to 15″ thick. That’s a really wide range in fit!
Zippers
Zippers slide up and down smoothly and the large pull tab is easy to find in the dark.
Zippers are what make Beddy’s really unique and easy for the person sleeping in them. I love a DIY project and I thought about trying to create my own zippered bedding. The zippers were my hang up. I was worried about the quality of the zippers that I’ve found at fabric stores and my own skills at sewing in a durable zipper. Also, the fact that I only found one person online who had attempted a project like this discouraged me. If 20 bloggers haven’t done it and posted about it, it must be really hard! I also found a few other companies that made bedding with zippers but they all seemed kinda cheaply made and didn’t offer the beautiful colors and patterns that Beddy’s did.
The Beddy’s zippers are the nice thick coil zippers with a big pull tab. Like the zippers in a high quality sleeping bag. I’m confident they can take some kid abuse. I was impressed with the quality of the construction. No loose threads or stitches to be found and the fabrics are soft and feel tightly knit and durable as well.
Once you zip open the bedding (and it zips down both sides and all the way off of the foot of the bed if you want), you have a soft minky fleece top and a regular cotton bottom sheet. The minky part also has an extra flap of fabric so you can wrap up without zipping if you prefer. Beddy’s offers all cotton options as well if you don’t want the minky fleece.
Look at those beautiful patterns together!
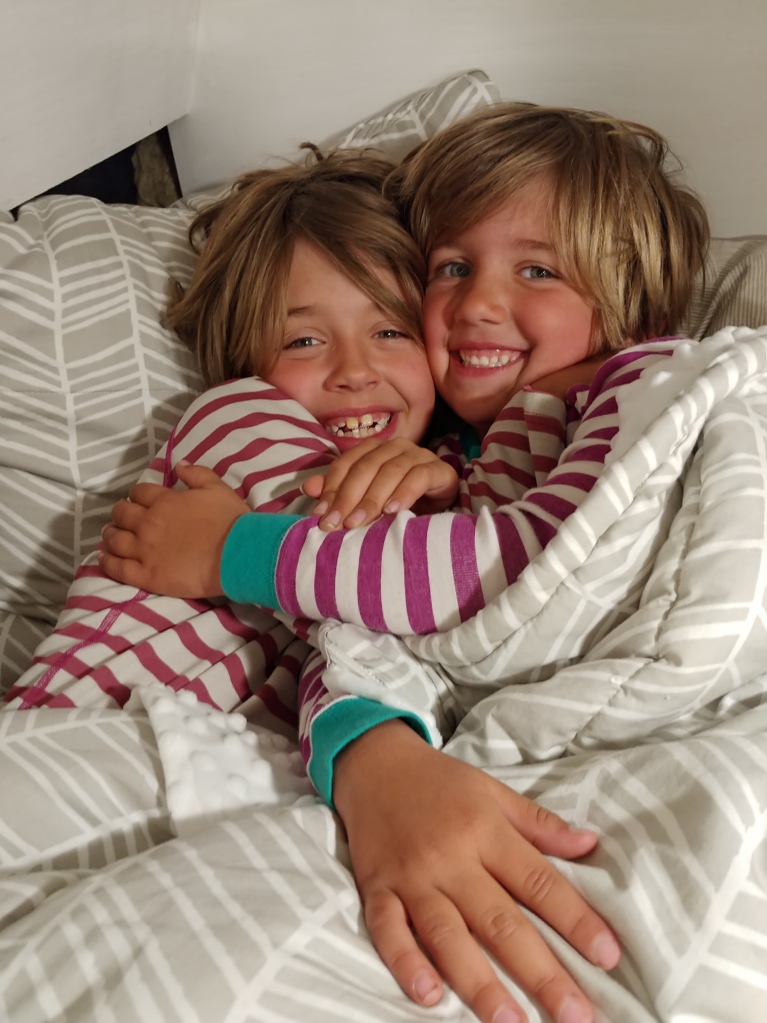
To the kids, the zippers mean two thing: fun and easy. They were stoked to be able to zip themselves into a cozy snuggly bed. They even wanted to cuddle up together.
Both girls just love the minky fabric. Kids go crazy for that stuff! We’ve been sleeping in some pretty cold conditions (down in the 30’s and 40’s in the bus when we don’t stoke the fire overnight) and they are staying perfectly warm with a combination of their Beddy’s and one extra blanket on top. I, on the other hand, am under 4 blankets and still waking up chilly. But they swear up and down that their Beddy’s are super warm. All parents know kids are a little crazy when it comes to being aware of cold but they are still saying they’re warm in the morning so who am I to question it.
Zipping in and out of bed is easy… Bed-ease… Beddy’s… get it?
Kids are lazy unless it’s fun. That might have been a bit harsh but I’m thinking of how my kids will roll up in a ball before they will bother to unfold the blanket at the foot of their bed to cover up when they’re cold. Beddy’s seem to be fun enough and easy enough they I notice that both girls will zip them up in the middle of the night if they get chilly. They like the enclosed feeling so it’s fun and grabbing a zipper is so much easier than trying to unfold and spread a blanket over yourself in the dark. Especially when your arms are less than 2 feet long.
I couldn’t get the girls out once I let them in after taking photos!
So now when I want the kids to make their bed, all they have to do is zip it up. Bonus, they can zip all their little toys and books under the blankets and their beds look nice and neat while still letting them keep all their stuff in bed with them.
Obligatory fake sleeping photo
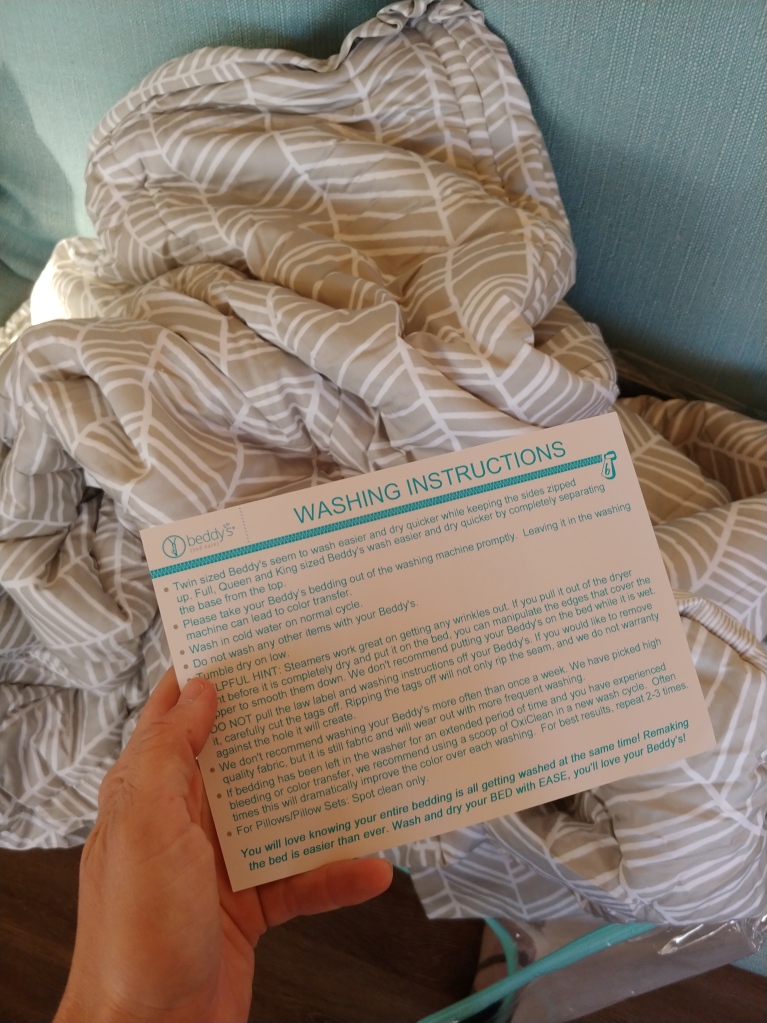
Washing
Beddy’s came with washing instructions. They are pretty standard issue so people like me who identify with the Mitch Hedberg quote “This shirt is dry clean only which means it’s dirty” won’t have any problem washing their bedding correctly. Wash cold, tumble dry low.
The one thing that surprised me (pleasantly) was that they recommended washing the twin size all zipped up as one big blob. This just meant less work pulling it apart and zipping it together. If they are really dirty, I would probably flip them inside out to wash.
Consensus
This was a good decision! My hallway looks neater which, when you live in 250 square feet, makes a huge different in how big your space feels. Now how can I justify buying some adult Beddy’s?
Looking forward from the master bed, through the hall, into the kitchen and living area
GPS Coordinates: 34.975306,-111.686528 These don’t quite get you all the way to the site. See below for details.
Overview
Flagstaff, AZ is an excellent hub for outdoor recreation and has gorgeous weather. It’s higher in elevation than many surrounding desert areas so can be a reprieve from the heat of the summer yet gets enough sun that it can be enjoyed all winter long. This FREE campsite is a great basecamp for exploring the area, a peaceful spot to relax in the woods, and has great cell service for digital nomads looking to get some work done.
Getting There
We drive a 40′ school bus and a Toyota Matrix hatchback so if we can get in there, you can too!
The site is about 1/2 a mile off of I-17, 17 miles (20 minutes) from the center of Flagstaff, AZ. Coming from Flagstaff, head south on I-17. You’ll take exit 326 for Willard Springs Road. At the end of the exit ramp you’ll turn right on to Forest Service Road 253. You’ll drive up hill on a paved road past a waste transfer station. Pass through a gate (open) and the road turns to dirt. Head to the right, traveling past some sort of containment pond on your right. We saw one campsite here with some folks staying in a 5th wheel. This one is going to be your easiest to access site, requiring no driving on bumpy dirt roads, but the scenery is lacking. You have a front row view to the waste transfer station and cell phone tower. If you continue past this site and the containment pond, you’ll pass into a pine forest and the road gets rougher. Take is slow and you can get a big rig and sedan down there just fine.
We are parked just on the edge of the field. An open wooded area is to the left in this picture.
Pretty soon you see an open field to your right. At this point you can pretty much go anywhere to set up camp. (The yellow in the map picture above shows the general area of the camping and field.) We took a branch of the dirt road to the right side of the field for an excellent solar powered camp! There are numerous fire rings and idyllic camp spots. You have the option of full sun for colder winter months and maximizing your solar power or a spot in the pines to keep cooler in the shade. Tenting here would be peaceful too. You can get back in the trees to feel a little more remote but even by the field, it’s not the kind of place a tent camper will feel like the little kid squeezed between two linebackers on the couch. (You know what I mean if you’ve ever tented in a predominately RV campground.)
Wet Weather
Because the roads are mostly dirt, the sites are dirt, and evidence in the field of deepish mud that had dried (4 inch deep cow and elk tracks), I would avoid this area after rains unless you have a 4WD vehicle.
Construction on I-17
When we were there in November 2018 there was construction on I-17 right at the exit for this site.All traffic, both directions, was required to take this exit and then get back on the interstate if continuing. The underpass allowing you to get from the campsite to I-17 Northbound was closed. So if you were coming from Flagstaff to the site, you had no issues but if you were at the site looking to drive into Flagstaff, you had to get on I-17 southbound, drive around 3 miles to the next exit, take it, and get back on the interstate going north. Not a huge deal, just slightly more time consuming.
Nearby facilities
Flagstaff is a 20 minute drive from this site and has pretty much any amenity and service you need. A bit closer, we found an RV park / Tiny House Village at the Munds Park exit (3 miles south on I-17). Same exit that we had to drive to in order to turn around and head north on the interstate. Everything was closed for the season in early November but we learned from the gas station attendants that they do water filling in the summer.
We never found a great free water fill resource. During our stay we just filled our two 5 gallon water jugs at various gas stations in Flagstaff that were kind enough to let us.
Flagstaff has a variety of RV parks that will fill water. Black Bart’s RV Parkwas one that we found who is open year round (many are not) and would fill water for $5.
Nearby activities
THIS is why we came to Flagstaff!
Oak Creek Canyon Overlook
Climbing
Adventurous climbing with a minimal approach can be found at the Oak Creek Canyon Overlook area. The adventure comes in the difficult to set anchors. This area does not have bolted anchors and setting the anchors was a bit dicey because of loose rock that is abundant at the top of the cliff. Other than the tops of the climbs, the rock here was excellent with great cracks and face climbing.
We didn’t check out any other areas but there are many other climbing areas nearby. We used Mountain Project as a resource.
Hiking:
Humphrey’s Peak drew our interest from 200 miles out as we drove west toward Flagstaff. It sits at 12,637 ft and is pretty much alone in it’s height other than the few smaller peaks flanking it. We opted not to go for the summit this time because of cold temps. While we were warm down at camp, the highs on Humphrey’s were in the teens and I wasn’t prepared to keep two young kids warm in those temps. You wouldn’t know it from looking, but it is part of a group of dormant volcanoes. The San Francisco volcanic field was a really surprising and fun find for us and gave us a great opportunity to learn some geology as a family.
Sunset Crater National Monument is just north of Flagstaff and has an informative visitors center with lots of well explained info on volcanoes and the rock types that they can create.
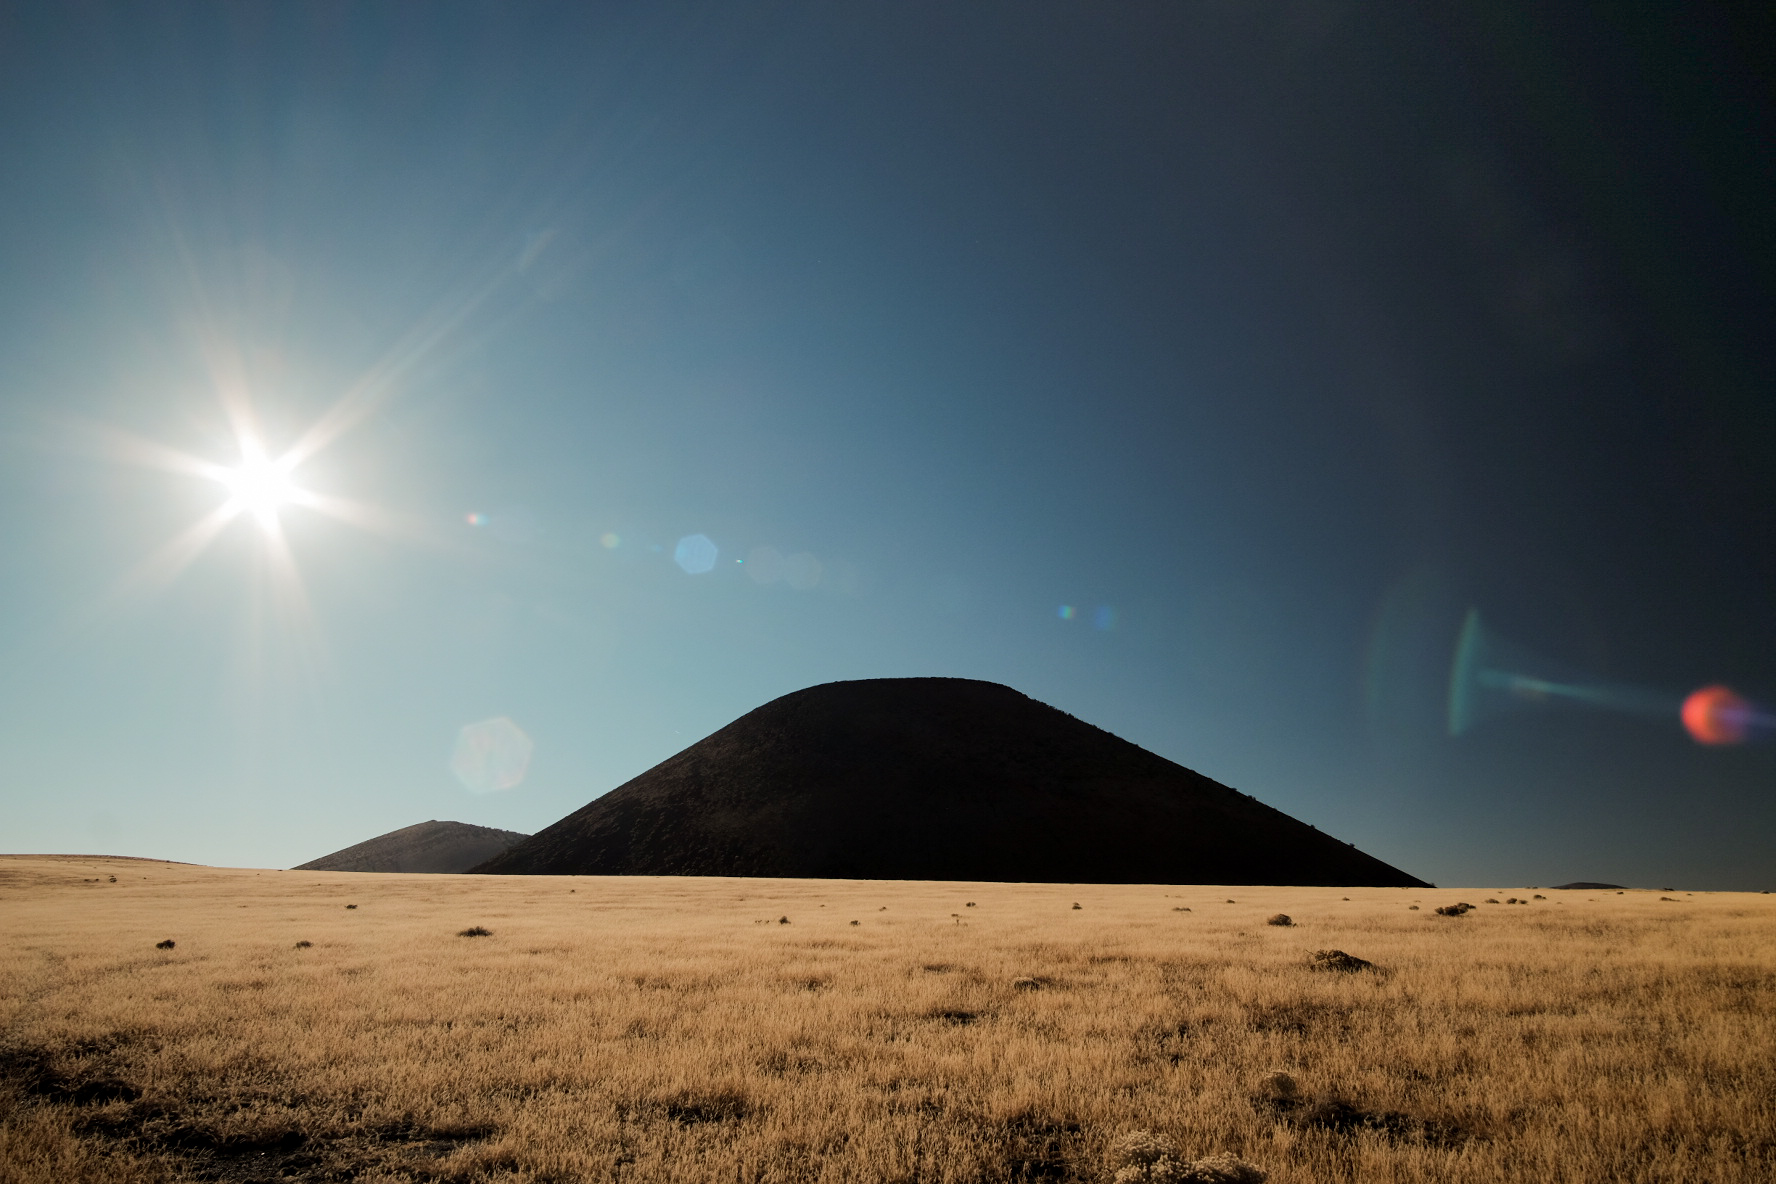
SP Crater is a short hike worth doing! We discovered it by poking around Google’s satellite imagery and the checking hiking project for additional beta. I highly recommend this short hike as an unforgettable experience. See our blog post for the full story and pictures.
Hiking through the desert landscape toward Devil’s Bridge.
The Sedona area is pretty amazing for hiking as well. It’s about an hour drive from the campsite. Red rock desert hiking is so plentiful here, you could spend weeks and not hike it all. We went for a sunset hike to Devil’s Bridge. Without a 4WD vehicle, you aren’t able to access the trailhead but you can easily park at the Chuckwagon trailhead and link up for an additional 1.2 miles, making the total hike 4 miles round trip.
Mountain Biking
Flagstaff is a hub for mountain biking and road cycling. While we didn’t do any while we were here, MTB Project shows tons of options for mountain biking.
Grand Canyon
The Grand Canyon is only 75 miles north of Flagstaff so you could use this campsite as a basecamp to explore the Grand Canyon. As always, I’m a huge fan of Hiking Project when exploring any new area.
Stargazing
This site was so dark and open to the sky that we had an amazing night of stargazing in the field. We could see as many stars as we’ve ever seen. The Milky Way was out in full glory! For astronomy fans, the Lowell Observatory is located right outside Flagstaff and has exhibits and tours.
Cell service
I can’t speak for anyone other than Verizon personally, but we had EXCELLENT cell service at this site. Maybe it had something to do with the giant cell tower by the waste transfer station??? According to reviews on Campendium, others are getting good service from both Verizon and AT&T.
Cleanliness
I’d give this site a B on cleanliness. I didn’t see any broken glass lying around and only a couple beer cans, but there was a big roll of tyvek blowing around like a flag in the field. There was some cow patties in the field but they all seemed old and fairly dried. There were a fair amount of fire pits but they were spread out decently and not too messy or full of lots of trash.
With an elevation of around 6,500 ft above sea level, this can be a great spot to escape some of the summer heat. The highs in July top out around an average of 80 degrees F, and the evenings get comfortably cool in the 40s. We visited in the late fall and were very comfortable. The fact that we had full sun in the field, meant that our kids were running around in just pants and long sleeved shirts in 40-50 degree weather and the solar warmth kept the bus at a comfortable temperature during the day. The nights were cooler, dropping below freezing most nights. We kept warm with our cozy wood stove from Tiny Wood Stoves! Flagstaff gets a lot of sunshine and not a lot of rain. Winters can be pleasant, just come prepared to keep warm at night.
Idyllic rating: 90/100
We stayed in this spot during the week and over a weekend. Most of the time we were the only one camped there. We had one other trailer come in for a night and leave in the morning and on the last day of our stay, another Skoolie and a trailer arrived.
We loved this spot for the network of dirt roads and open visibility. Our kids were able to ride their bikes all over and still be close enough to see our bus. We felt secure allowing them to roam because of the low traffic. Some trucks drove through during the day (maybe 4 per day) but it was pretty quiet in this site.
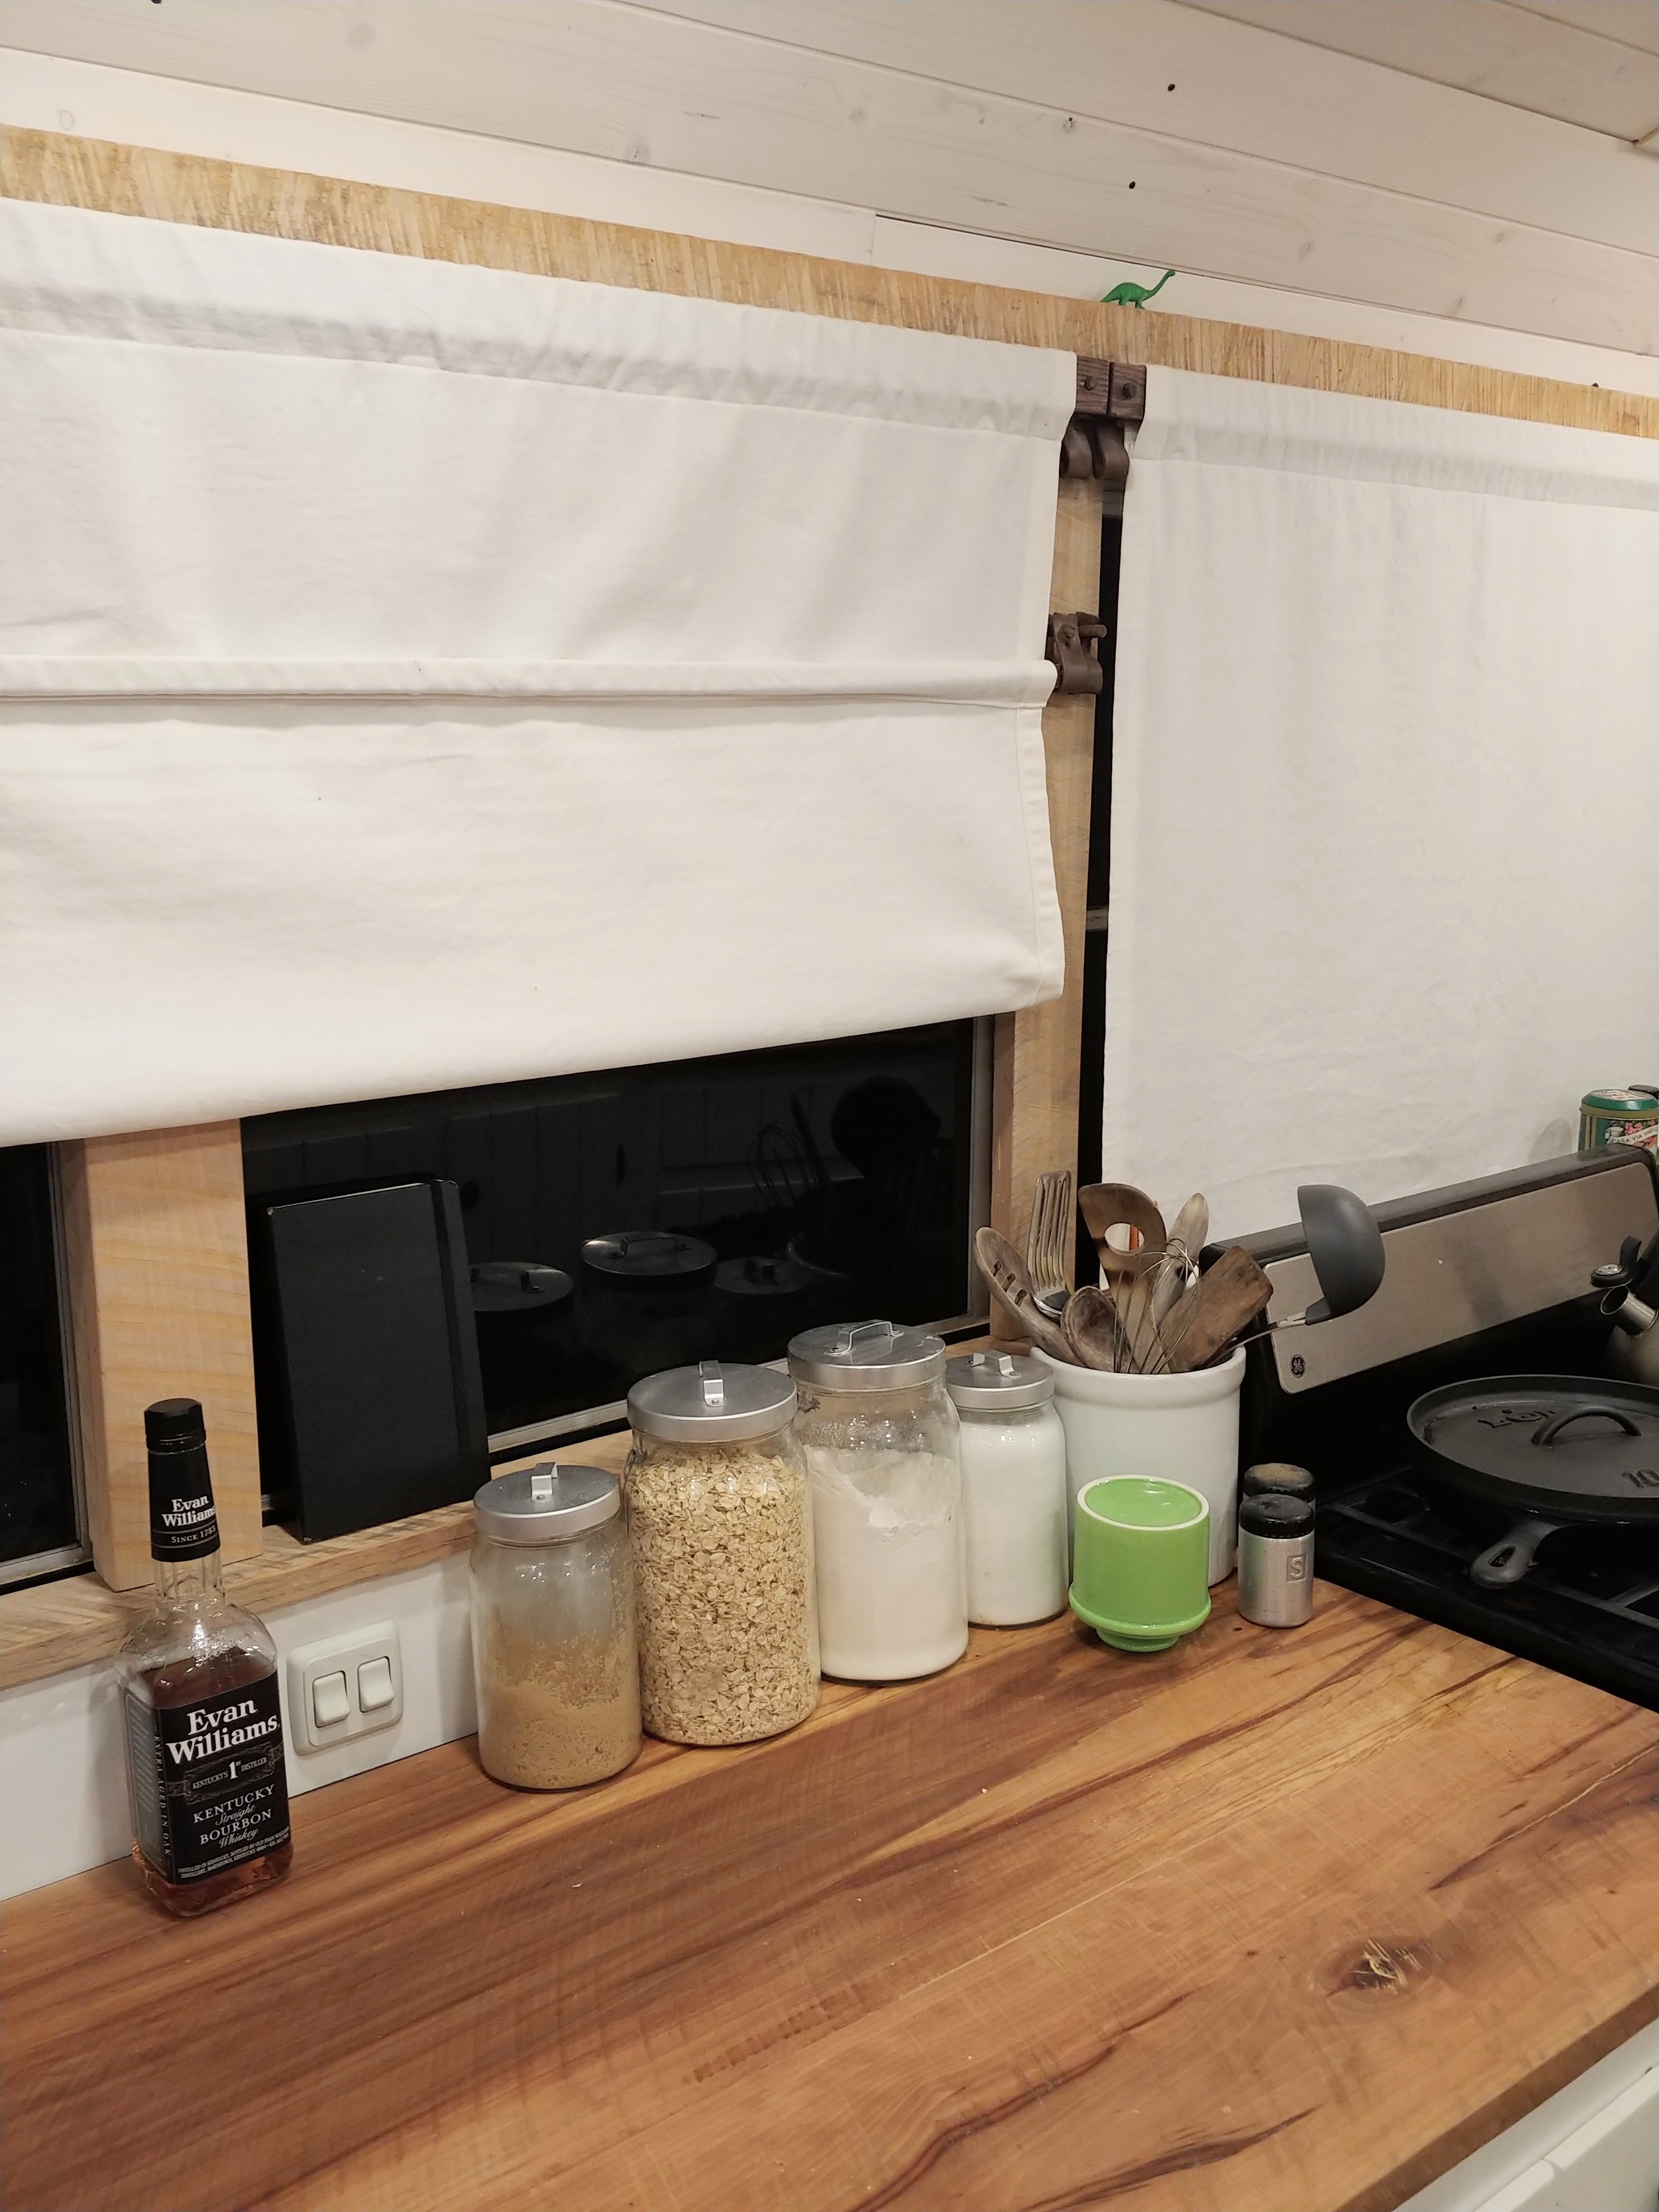
I get a lot of questions about our curtains. I’m going to do my best to describe them and show how they work .
Requirements
Smooth: Adam didn’t want the look of curtains that pulled to the side
Can be raised: I like to be able to see outside, check out the scenery, be a nosy neighbor 😗
Can open windows for ventilation while still providing privacy
Cheap
How we solved all of the above
There are several types of curtain designs out there that provide a smooth face and can be raised. Roman shades and roller shades were two styles we liked a lot. I didn’t want to spend the money buying a roller shade just to have to disassemble it to get it the right width for the bus windows. I felt confident that with some Pinterest searching, I could DIY a Roman shade but there was the problem of opening our windows for airflow from the top while maintaining some privacy in our skoolie.
The curtains needed to go up and go down. The big problem that created was that there couldn’t be any solid attachment point to the wall. Every part had to be movable!
Our curtains span two windows each. This helps with the clean, smooth look. Less breaks in the material give much needed visual simplicity to the small space of a tiny house on wheels. I sewed these from fabric I purchased at a reused goods store (cheap! Like $6 for all of it!) You have to really look closely to notice that they don’t all match: three separate fabrics are used.
Two pieces of wood span the top and bottom of the curtains. Two sets of dowel rods with leather loops screwed to the wall behind them are attached to the window frames. The top set allows the curtains to hang fully from the top to the bottom, covering the entire window. We hang them this way to help keep the heat or cold out. The curtains aren’t insulated (we thought about insulating them but wanted natural light coming through the fabric when closed) but just having a thin piece of material up there does make a noticeable difference in the interior temperature of the bus.
Upper and lower dowels give the top of the curtain two options for positioning. Leather loops allow the bottom of the curtain to be lifted to various heights.
When we want to let in a little more light or heat to warm the bus up in the morning, we can lift the bottom curtain and hook the wooden rod into the lowest leather strap.
Simply fold up the bottom to let in a little extra light.
And a little more light… We can roll the curtain around the bottom rod all the way up to either of the two levels of leather straps. During the day, unless it’s too hot, I prefer to keep them all the way open like this to enjoy the view and allow me to open and close the windows to adjust the temperature in the bus.
Left window is rolled all the way open. The right window is rolled most of the way up but can still block incoming glare from a low winter sun.
The most specialized feature is the we can also lower the curtains. We kept all of our original bus windows (except for behind the refrigerator and the shower.) In our Thomas Saf-T-Liner school bus, the windows open by pinching together tabs at the top and lowering the top half of the window. There are stopping points in the frame every inch or so as you open the windows.
Can you spot our tiny friend?
Instead of attaching the top curtain rod firmly to the wall, we drilled holes in either end and fitted them on the dowels. It had to be a tight fit or they could easily get knocked off. We found that throughout the humid summer in North Carolina the wood swelled and some of our curtains became too difficult to remove but as soon as we got to the arid Southwest, we were again able to remove the curtain rods from the dowels. We typically like to camp in fairly remote, not heavily trafficked campsites but if our curtains are open at night, we are still on full display for anyone who might happen to drive by. So all we have to do to keep our privacy and get some fresh night air is take the top curtain rod off its dowels, roll the curtain twice around it, and fit it onto the lower dowels. Lower the window a bit and there you have it.
Windows cracked open about 2 inches for fresh air
I want to give an inspiration shout out to @therealtiggirl of Instagram. She posted about her curtain design while we were trying to design ours and we were so inspired by her great system for lowering the curtain we had to rip it off! And so, I pass along her great idea to any of you who may be looking for a solution to privacy and fresh air in your bus conversion.
Thanks for reading! And thanks to everyone who asked about our curtains for getting me to get around to writing this post!
As we drive out of the hills through the juniper on a forest road above Albuquerque, tumbleweeds dash across the road as the wind races across the landscape. I’ve never been good at relaxing in windy situations, even if inside. We reach I-40 and a wicked crosswind keeps the bus from reaching our usual 60mph speed as the she’s blown left and right. Slowly, the landscape shifts. Red rock mesas appear and the wind subsides. I see some black ground off the highway and read a billboard that says something like “Grants, The Land of Fire and Ice”. I suddenly realize the black ground was a lava flow. I had no idea that New Mexico had a volcanic history. Fascinated, I call Elizabeth who was driving about 10 miles back. “You gotta see this!”. The flow borders I-40 for a few miles and is soon gone as we drive off towards Flagstaff.
We didn’t stop at Grants, but my curiosity was piqued. Later I researched it and there are all kinds of craters and lava flow remnants in that area. I’ve made a mental note to return and see what it’s all about. When I think about volcanoes in the US, I think Shasta, Rainier, Hood, or even Yellowstone. But to see black lava on the surface in western New Mexico was a surprise.
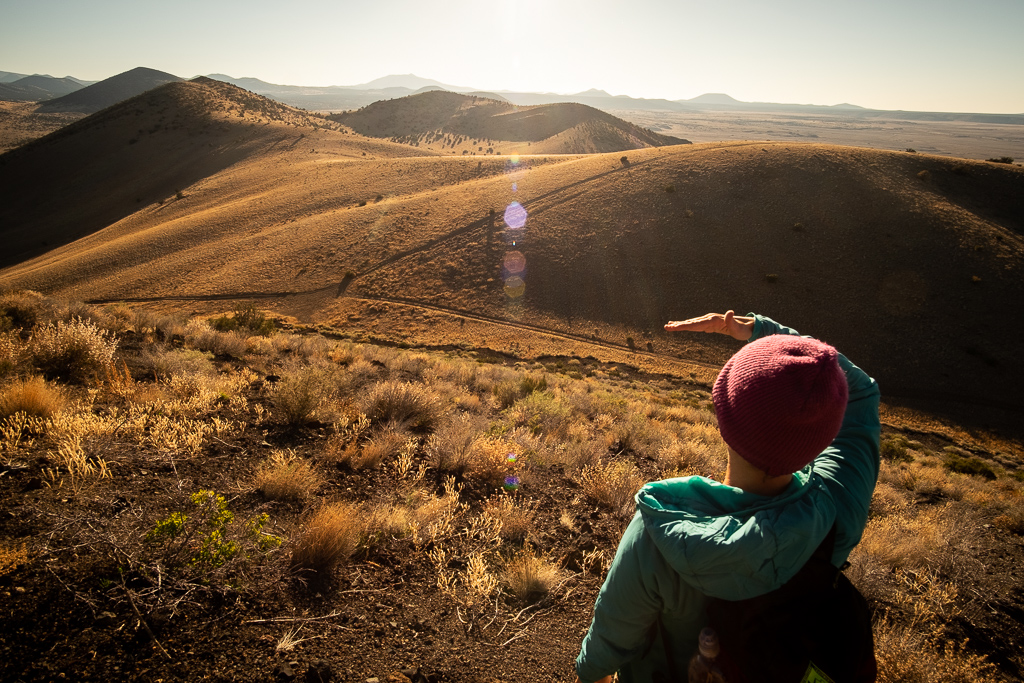
After getting settled into our new backyard at a great campsite just south of Flagstaff (maybe an upcoming site review?), we were looking for places to hike and climb with the girls. I was looking at Humphrey’s Peak above town contemplating a late in the year ascent. At 12,637ft, snow and cold temps made it a bit more of an adventure than we were looking for but as I looked at Google Earth, I saw, just north of Humphrey’s, what looked like a whole group of cinder cones, one specifically, had a dark black lava field that had flowed out of its north side. I also saw, in that same group was Sunset Crater National Monument. After some research I found directions to hike SP crater, the one that had the black lava flow.
Plans were made. First we would go to the visitor center of Sunset Crater NM for the geology lesson/homeschool (have I mentioned how awesome homeschool is?), then we would go to the mountain for an afternoon/sunset hike of SP crater.
The visitor center was informative. We learned that Sunset Volcano last erupted about 1000 years ago and the difference between pumice (cooled very quickly with a lot of air pockets) and obsidian (cooled very slowly), and the types of flowing lava rock ʻAʻā lava slowly flows and breaks up into chunky rock and Pāhoehoe, that flows faster and the surface cools and hardens in a flowing rope-like structure.
We drove north from Sunset Crater towards SP Crater…
The “accident” spilled out in that direction.
Okay, so about SP Crater: C.J. Babbit, a rancher from the 1880’s who owned the mountain said that the mountain resembled a “shit pot”. I guess the lava flow and the round crater rim can resemble a toilet catastrophe. Map makers refused to spell it out and just abbreviated it to be SP Crater.
As we drove north from Sunset Crater National Monument on Highway 89, we went from a forested area into a landscape of junipers then into something that more resembled an open prairie with random mountains/cinder cones. At “Hanks Trading Post” we turned left and followed the gravel road for a few miles until the road got to the base of the most prominent cinder cone in the area and climbs to the saddle between the next mountain over.
We start up the road to the saddle and immediately the grade is so steep that we have to be careful not to slip as we go, but soon enough we are at the high point between mountains and have to leave the road and make our way to the summit. The footing now is loose and the small pebbles have nowhere to go other than into our shoes. The dried plants all have seeds in them so that when we brush by them it makes a sound like rattlesnakes. The sun is low in the sky making everything glow in the golden evening light. On the way up the cinder cone proper, we find bits of obsidian and pumice and occasionally some ʻAʻā and Pāhoehoe. The higher we get the more the surrounding landscape starts to take shape into a land of volcanoes. To the south, sitting just below Humphrey’s Peak, the amazing Colton Crater’s rim is wide and lower than SP Crater. The whole landscape on fire with the evening light.
Picking our way up the side was pretty straightforward and soon we were on the rim. The caldera was steep, dark, and uninviting, but the rim beckoned. The wind blew and the cold temperatures set in. The sun was almost setting and we had only gone around a portion of the rim so Elizabeth stayed back with Wren while Sadie and I circled the caldera. Lichens and dry grasses grew amongst the rocks. Looking to the north the lava field spread for miles (4.3 miles to be exact). Further across the landscape lay the Painted Desert and the rim of the Grand Canyon.
We made it back to Elizabeth and Wren and started back down the cinder cone wall. At this point the sun made the whole area glow more gold than ever. The kids had fun “skiing” down the loose pebble slope as the sun set.
This area surprised me. No trail signs or trailhead to speak of. Not even an actual trail. So close to Flagstaff, yet it seems like a bit of a secret. If you are in the Flagstaff area I highly recommend this hike. It’s not a long hike at all (maybe 2 miles out and back) and the scenery and geology are stunning. I highly recommend this as a sunset hike. The whole San Francisco Volcanic Field is amazing. If you visit, do us all a favor and practice LNT practices. Tread lightly, leave what you find and take home what you bring. This is truly a special place that should be taken care of.
-Adam
For driving directions to the crater, visit Hiking Project or download the free app.
True to form, I haven’t updated this blog in an absurd amount of time. As it turns out, I had too many things going on to include a blog in my life. I’ve got this theory that “You Get Three Things.” We all have a certain amount of time in our lives, and in that time we have to fit in sleeping, eating, earning money, and people (family and friends). On top of those thing, you only get three more. Those things can be hobbies such as running, knitting, photography. They could be projects such as remodeling your bathroom or building a skoolie. Or maybe you have something else that takes your time and energy in your life such as caring for an aging parent or working a second job or blogging.
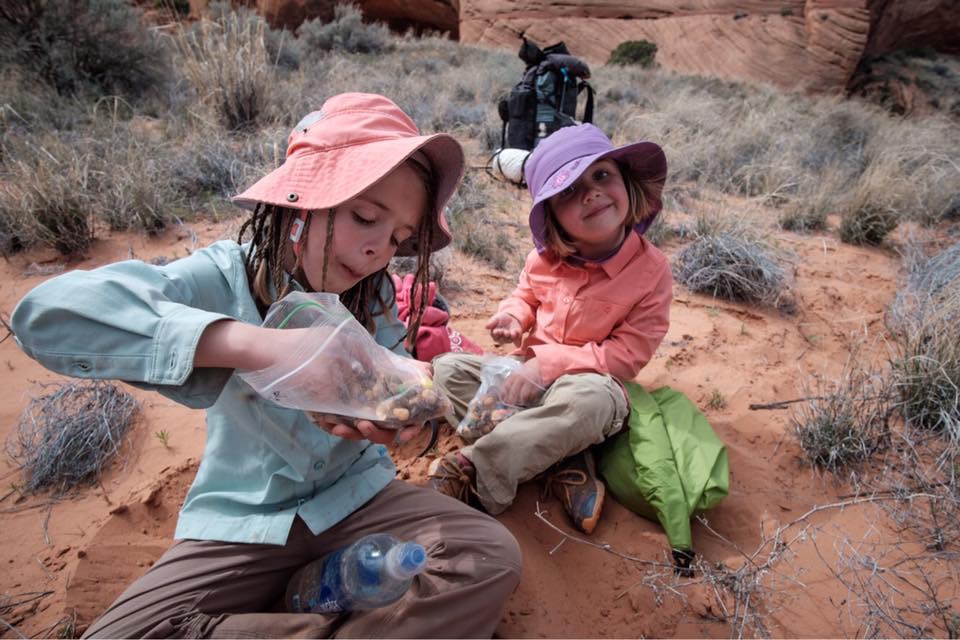
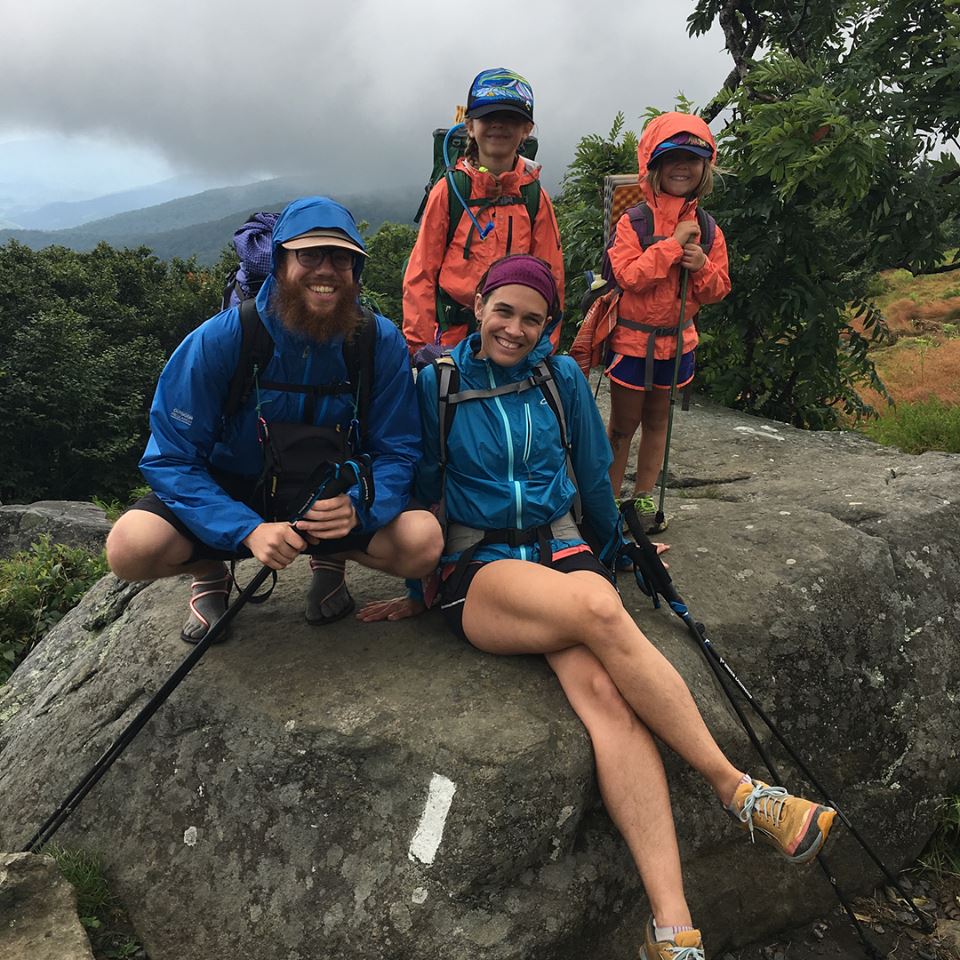
Family backpacking trip on the Appalachian Trail in the Roan Highlands area of TN/NC
I used to say that my three things were running, backpacking, and climbing. After buying the bus, one by one, these dropped off my list as more and more of my time went to skoolie conversion. Over the last 9 months, ALL three of my things have become school bus. Adam and I decided at some point in the process that we not only wanted to live in a school bus but we wanted to travel full time because we want more than three things!
At the beginning of the summer Adam and I sat the girls down and told them that this
Cute and may or may not have resulted in a serious case of poison ivy.
summer was going to be a 1970s summer. Meaning, they were going to have to entertain themselves all day, every day. We explained to them that this was so that in the long term we could spend more time together as a family. They said they understood and supported the plan but, of course, as kids they didn’t’ understand what that would actually mean in terms of what their days would look like and they didn’t really have the ability to look that far into the future.
So we spent the summer saying things like “I’m sorry, but we have to work on the bus. You’re on your own!” and “This is totally going to be worth it! You’ll get to spend so much time with us when the bus is done.” We did nothing in our free time but work on the bus… well that’s not true. You throw life in the mix with a few cases of lice, a trip to NY for a wedding, a little bit of backpacking and climbing, some raging poison ivy, a week at the beach, and throwing an epic Harry Potter Grand Feast birthday party. We still did some fun stuff but it sure felt like every waking moment was BUS.
August comes around, the girls go back to school and Adam and I realize one day that the end is in sight. We don’t just high five each other and keep working but we set an unrealistic deadline to move into the bus, sell the house, and quit our jobs. Mid-September is the date that the house has to be ready to sell, the bus has to be ready to live in, and we turn in our notice at work. Woah. When we put it on a calendar it got real.
So that month was spent waking up at 6am and going to bed after midnight. Some days I would wake a 6, work on the house or bus, go to work for 8 hours, come home and work on the house or bus until midnight. Adam spent all of his days preparing the house and the bus. By the end we were both so spent that we couldn’t imagine doing another thing to our house. Because we wanted to save every last penny for our travelling life, we refused to pay anyone for any work that we could do ourselves. Which was everything.
Did I mention that during this month we also had to sell everything we owned that wasn’t coming on the bus? So much time spent pricing yard sale stuff, orchestrating meet-ups with people from online sales forums (facebook marketplace, offer-up, craigslist). It all culminated in one three day weekend of yard sale, bus tours, going away party, and even an open house going on at the same time as the yard sale!
We had to say goodbye to a lot of family and friends. That part was hard too. The kids have grown up living in the same town as my parents and seeing them pretty much weekly. Before we left, we had started making plans to get together at Christmas. They are already missing their time with Nana and Granddaddy on the road and can’t wait until we meet up with them in a couple months.
Key hand-off
I also had to say goodbye to a job I’ve worked at for 7 years and people, many of whom I’ve worked with for 4+ years. I started working at REI in 2011, shortly after we moved back to NC. It’s been a second home to me. Being the leader of that store’s team, it felt like I was abandoning people who depended on me, even though I knew they had an excellent leader lined up to take over. It was strange because I had never had to leave a job where I had to think about how others would feel if I left.
One day, it was finally time to move in!
I’ll say after the fact that all of the work we put into getting ourselves to this new lifestyle was worth it, but it was really hard emotionally. I’m sure it took a toll on our family relationships. Now we are living in the bus, none of that matters because we have all the time in the world to spend together and get closer.
We took a final family photo before we embarked on our nomadic life!
We’ve been on the road for two weeks now and are getting used to bus life. The easy part is being in the bus with each other. It’s a comfortable space, doesn’t feel small, and we are much more at ease with each other. The harder things have been: internet usage and data limits, where will I get my next wifi, filling the water tanks, low power lines, navigating traffic, and forgetting to put away certain things when we travel. Because we left so quickly, we definitely didn’t have our shit together for this new life. I mean, right now we are carrying around bags of insulation for parts of the bus we haven’t finished, we haven’t figured out health insurance yet and our coverage ends in 11 days, and until today, we each only had 2GB of data on our phones. We are working through the transition with all the technicalities but the family stuff and road life… WE LOVE IT!
Boondocking on a small fishing lake in Oklahoma
Boondocking campsite in the Arizona mountains. Beautiful meadow surrounded by pine trees.
More to come on our bus and life on the road. I’m planning on taking this blog from the story of our conversion to the story of life on the road, adventuring with kids, great free campsites for big rigs, and more. Thanks for checking us out!
– Elizabeth
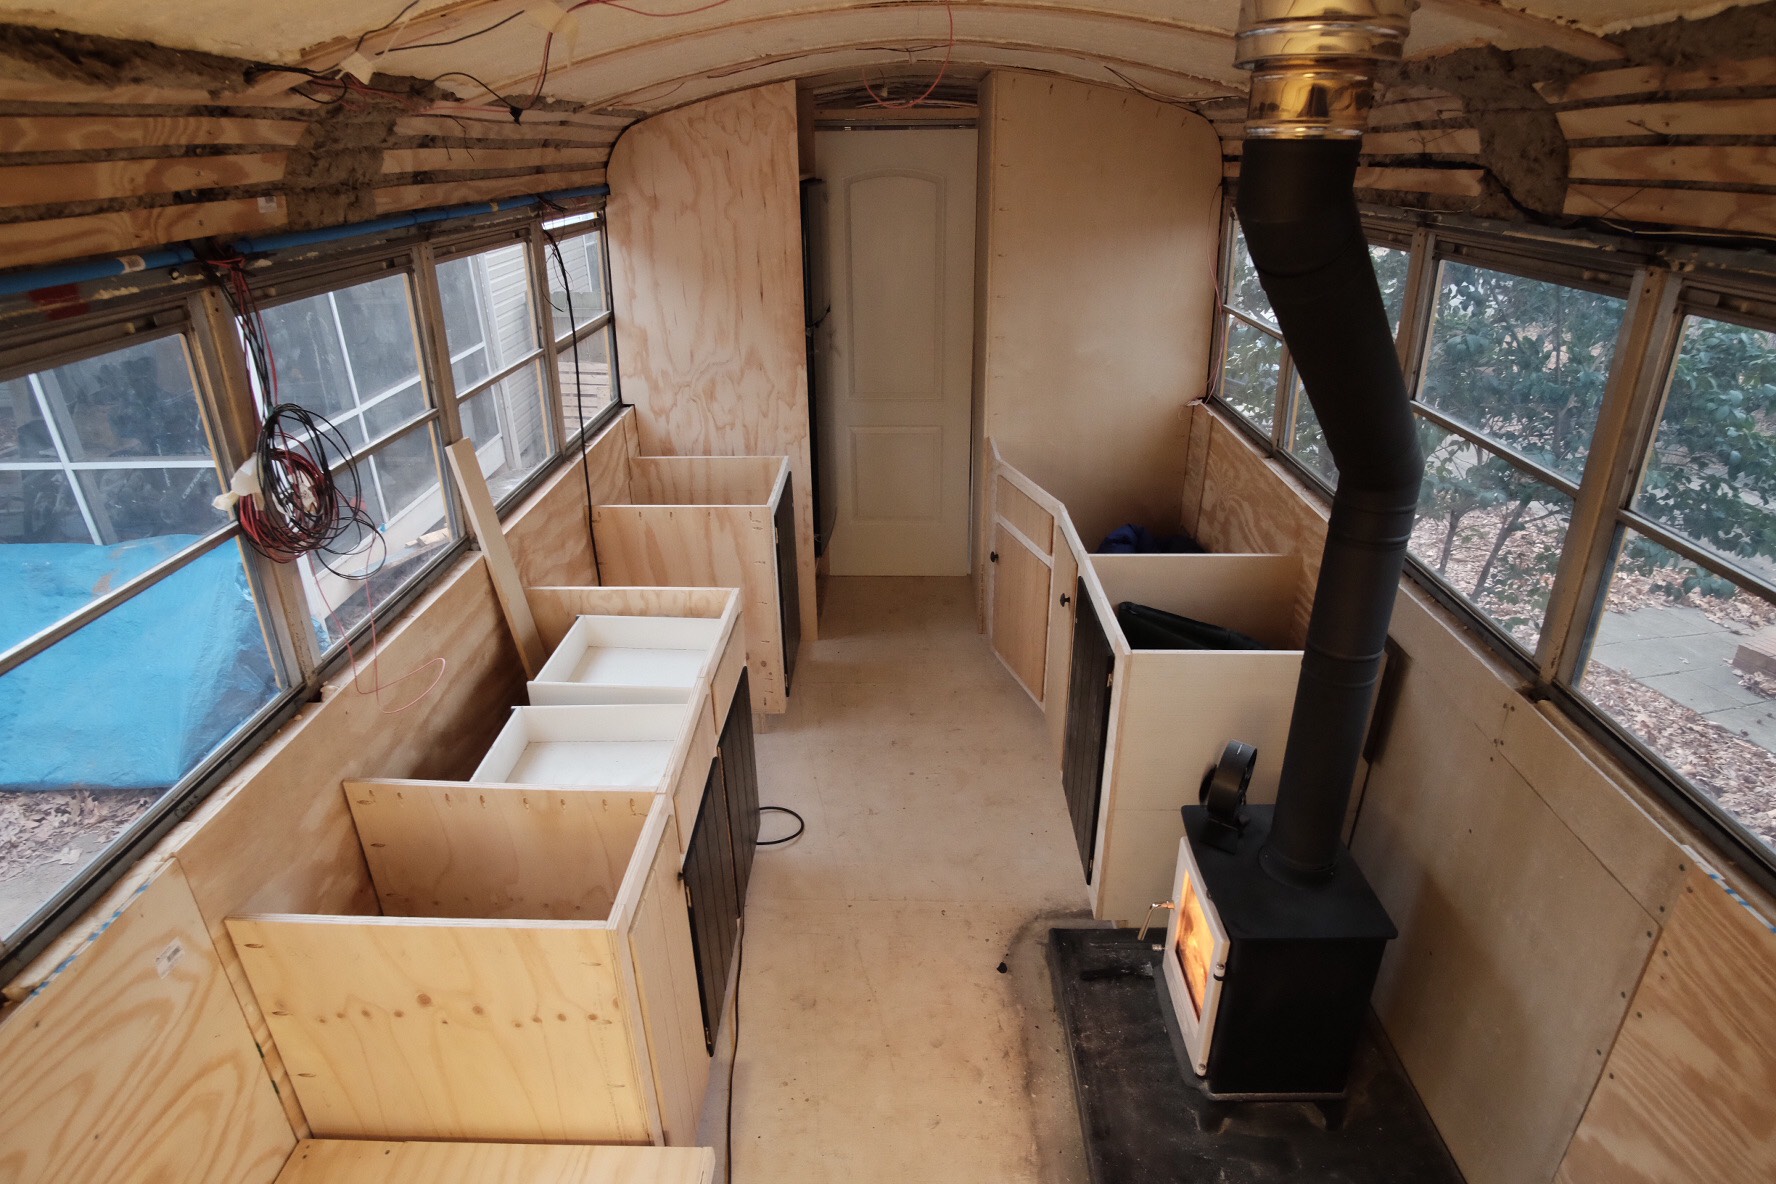
We keep building a little of something here and there but it never seems like enough to be worthwhile to post an update… yet, 6 months later, the transformation inside the bus is pretty major.
Lower Walls
Plywood has been installed over reclaimed rigid foam insulation. Most of it will be covered with built in furniture so we used cheap plywood. For the very few areas that aren’t covered, we will cover with some decorative/higher quality wall material.
Beds
We made final decisions about placement of the kids bunk and master bed and framed them out. The master bed had to be positioned so that the water coming into the bus could feed downhill into the tanks underneath. After framing we wanted to make sure we could use as much of the under bed areas as possible. They won’t be super accessible but we are thinking that we will store our backpacking and climbing gear in the large deep areas. We created a hinged plywood platform for the bed which will allow us to get into both sides of the storage without having to pick up the entire mattress. I sewed a hanging fabric storage system to utilize the shallow space above the water tanks for smaller items. I was able to use all re-purposed fabric from a store called Reconsidered Goods in Greensboro, NC. They have given us the ability to save money and buy used on many things for the bus, Christmas gifts, school supplies, etc. If you are local, check them out at Reconsidered Goods. PS – not sponsored. I’m sure they don’t sponsor things because they are a non-profit 🙂
Framing out the kids bunks went smoothly. We topped them with plywood and screwed it down. They will have storage in two large drawers under the bottom bunk.
Bathroom
After much debate and exploring every possible material available to make a shower, we landed on a stock tank with a surrounding shower curtain. I didn’t love this idea and initially wanted a standard shower surround. I was afraid of leaks with any other material we could create the walls with, afraid of cracking with tile, and how to seal seams with anything else. We were priced out of buying a ready made shower. So I spent some time on Pinterest and we were able to convince ourselves that we could make a stock tank and shower curtain with some exposed pipes look nice. See how beautiful that tank is all painted? We prepped the galvanized metal for paint with ammonia and water soaks and sanding. The outside was painted with a satin black rustoleum. We coated the inside with three applications of a Homex tile refinishing kit. We’ve heard mixed reviews about how it holds up on galvanized metal so we will report back after some time. The wood in the bottom is Brazilian walnut. Supposedly similar in performance to teak but a lot cheaper. We will have the whole floor of the tub lined with that.
To build the walls on a curved ceiling (a challenge ever skoolie converter must face) Adam scribed the ceiling onto a piece of luan to use as a stencil. Even with this guide, it took many trips in and out of the bus with a big piece of 3/4″ plywood to get the fit just right. We built the walls out of 3/4″ birch plywood. It was so expensive! The bathroom door will be a sliding barn style door.
Closets
Once I saw the closets in place with their shelves I could really picture living in the bus. Now I know that there will be plenty of storage. This picture doesn’t have the best light but it shows one of the closets. The shelves go from floor to ceiling. We tried to find a way to use the doors we got from my parents’ kitchen remodel for the closets but it was just creating weird shapes. With such a small space, I knew I wanted it to be clean and consistent in appearance. We found some old closet doors at Habitat ReStore that were light weight, not too thick, and the perfect size to create closet doors. We won’t install the doors until I paint the interior of the closets so I haven’t yet seen them in place.
Wood Stove
We did a lot of research before deciding on a wood stove. We went with the Tiny Wood StoveDwarf 5kw. It’s designed to heat a space of under 500 sq. ft. At 200ish sq. ft. we clearly have enough stove to do the job. The reason we didn’t opt for a smaller one is that a bus’s windows suck a ton of heat out. Even with all the insulation we put in, and thick curtains we will use in the winter, the windows will make this space not as efficient to heat as a tiny house with double-paned windows. So we are prepared! If you are considering a tiny wood stove, I recommend them very highly. Nick, the owner, was super helpful and gave great customer service. He answered so many questions about the installation of this stove into a school bus. Also, our stove arrived with a broken door and some dings from shipping and he totally took care of us. Now that I think of it, the broken door is still in my house waiting to be sent back. (Nick, I promise to get that out to you soon!)
The installation of the stove was probably the biggest project since the roof painting and rack creation. First we needed a heat shield to put the stove on. We wanted something that would feel like a hearth to a fireplace and ended up deciding to pour a concrete slab. Adam built a form then cut some re-bar and laid it in. He had to mix the concrete in multiple batches because we didn’t have a large enough trough for mixing. Once the concrete was totally dry, Adam had our brother in law help him lift it down to the ground (Thanks Justin!) He cut a piece of cement board, mortared it to the ground, then mortared the concrete slab to the board. We stained the hearth black and used a water based stain to avoid the chemicals and clean up involved in acid stains. I sprayed on the stain with a dollar store squirt bottle. I ordered the stain on Amazon. The brand was Marshalltown but when I received it, the stain was branded as Butterfield Color. Either way, it turned out well and went a long way. I used only a tiny portion of the 4 oz. bottle. I then sealed the hearth with a couple thin coats of GhostShield Cryli-tek 5500 concrete sealer. Again, I used the tiniest portion of the 16 oz. sample bottle I bought. This stuff goes a long way!
Next we had to figure out a secure way to ensure that the 300 lb concrete slab and 150 lb. stove didn’t go flying if the bus came to a sudden stop. Adam drilled straight through everything and thru-bolted it all together with long threaded rods through each foot of the stove and through the floor and Unistrut under the bus. That thing is not going anywhere.
Finally, to complete the stove installation, we cut a BIG hole in the roof of the bus and ran the pipe up and out. The install kit required some slight modification to work with our application but it went together surprisingly easy. When you’re building a house out of a bus, EVERYTHING is custom. Right now we have cement backer board behind the stove and will later install a nice looking heat shield over that. Having the stove has made a big difference in working on the bus this winter. Last year we bundled up in many sweatshirts, hats, and gloves but this year we just keep the fire running and the bus is nice and toasty. Even in sub 20 degree weather!
Ceiling Insulation
Cut a bunch of pieces of the reclaimed rigid foam, glued them to the ceiling while holding it all in place with 2x4s. Mostly the foam bent into the shape we needed but we did break a few pieces in the process. Broken foam still insulates though! For the sharper radius of the ceiling bend close to the walls, we used a soft rock wool insulation.
Wiring
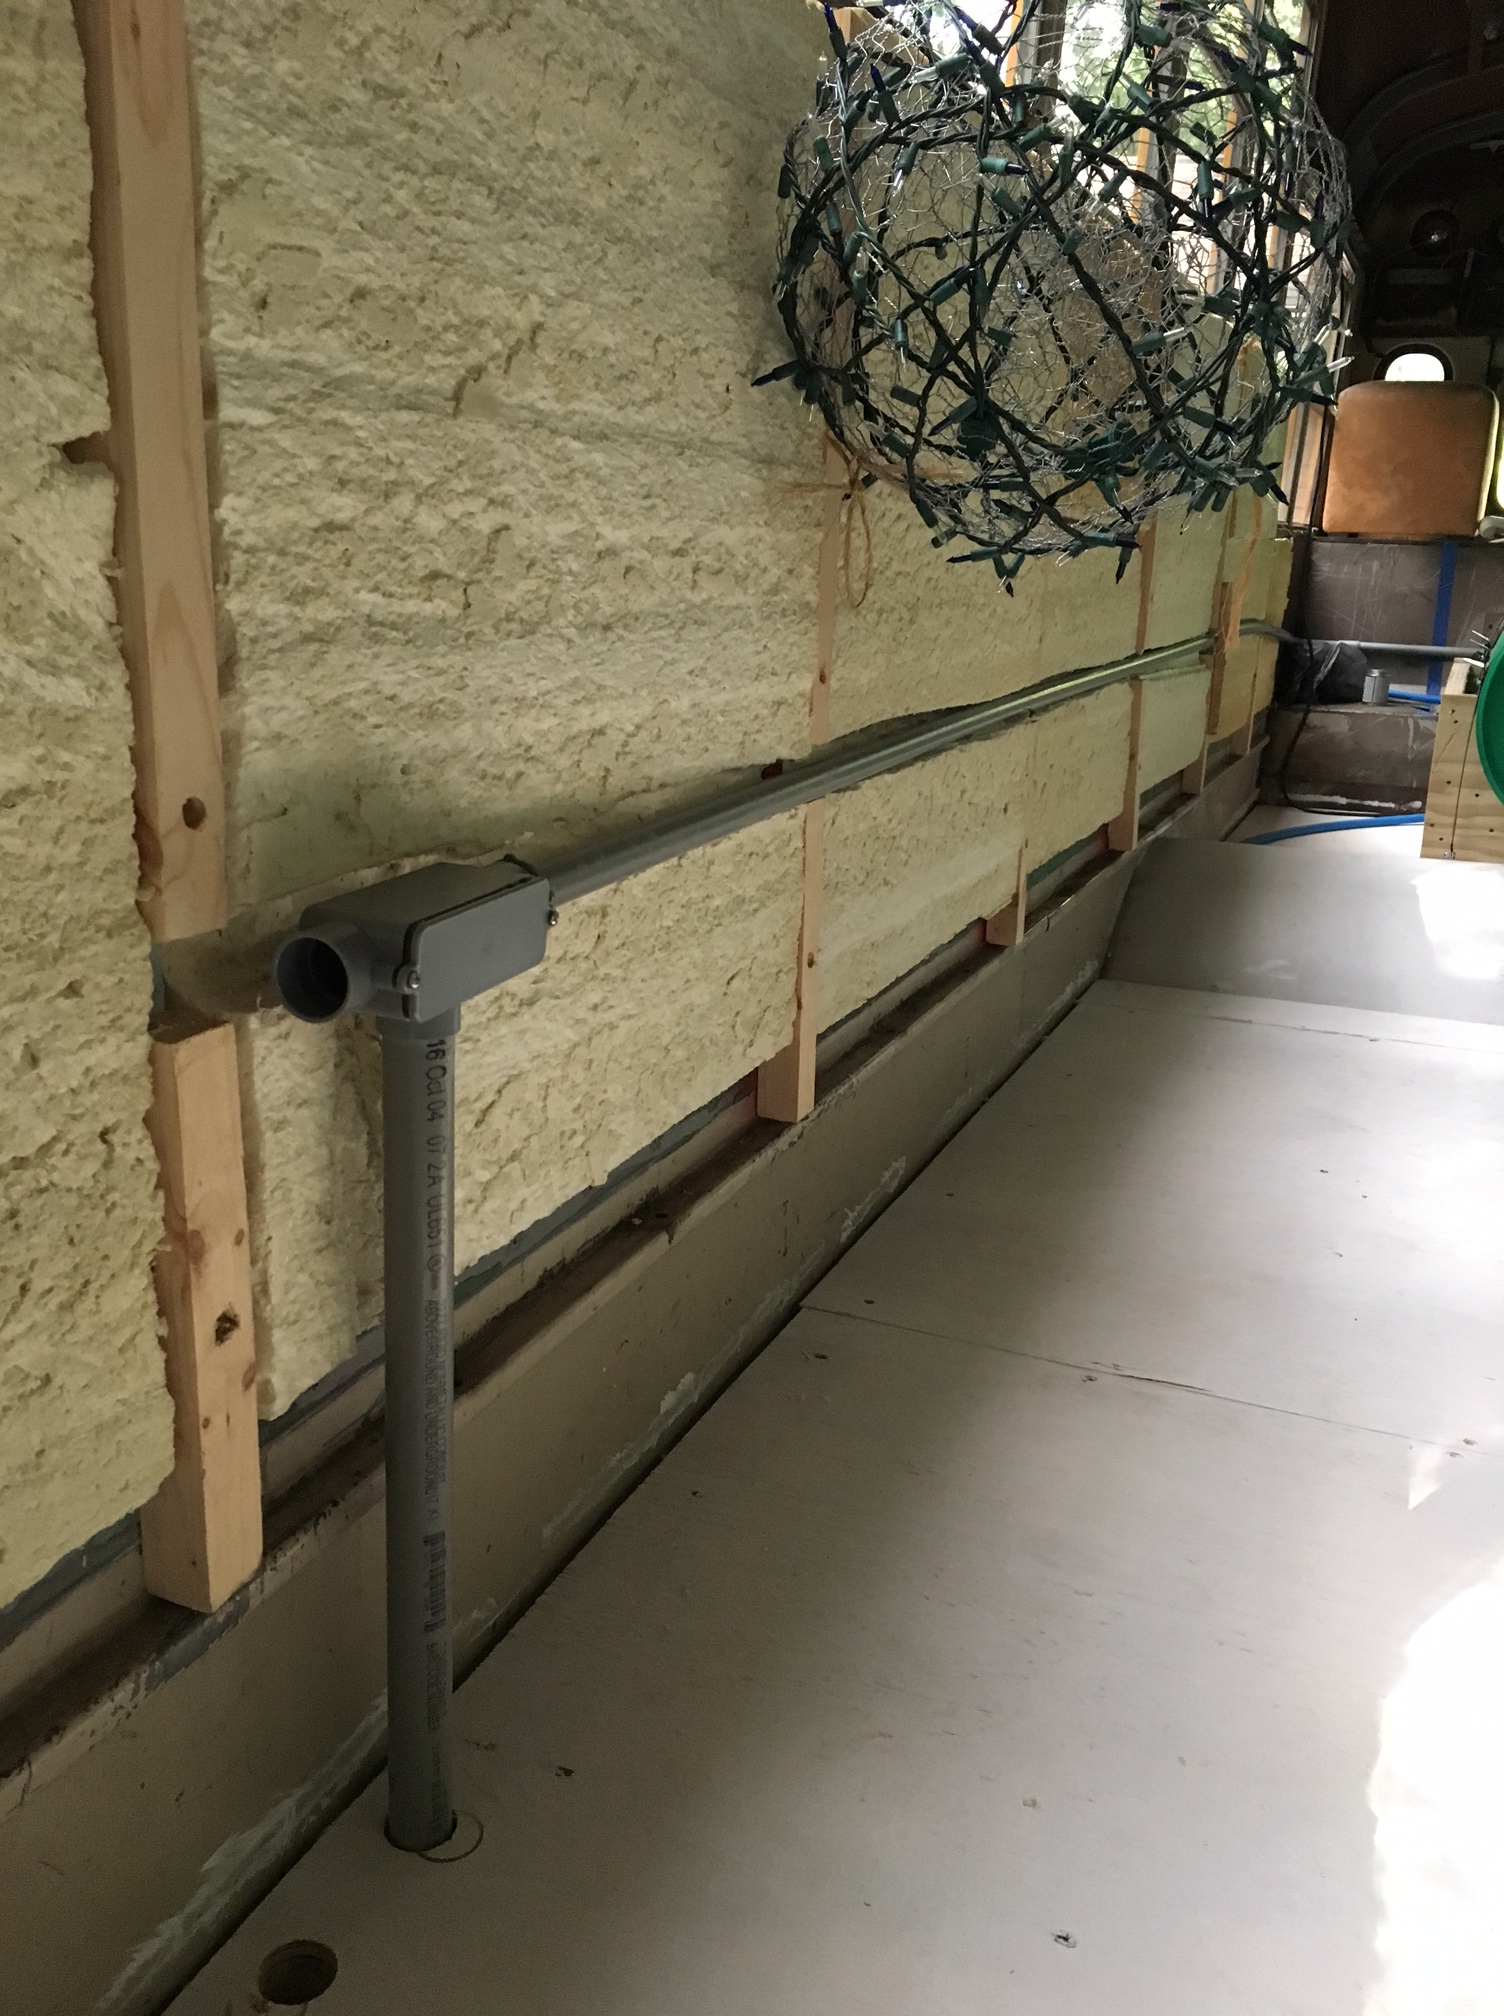
Our bus will run a 120v system as well as a DC system. Conduit is run in the walls for the AC wiring. Adam also ran the DC wiring along the tops of the walls and across the ceiling to get ready to install our LED lighting when we install the ceiling panels and other 12v fixtures.
Fridge
We Black Friday gifted ourselves the cheapest fridge! Adam did a bit more scribing to build the walls to frame out the fridge. We couldn’t secure this cabinet in place until we installed our pocket door. For the pocket door we ended up using the hardware that is used in closets with sliding doors. Again, being all custom, the pocket door was much more difficult to install than anticipated but Adam burned the midnight oil (or the midnight wood in our case) one night and made it work!
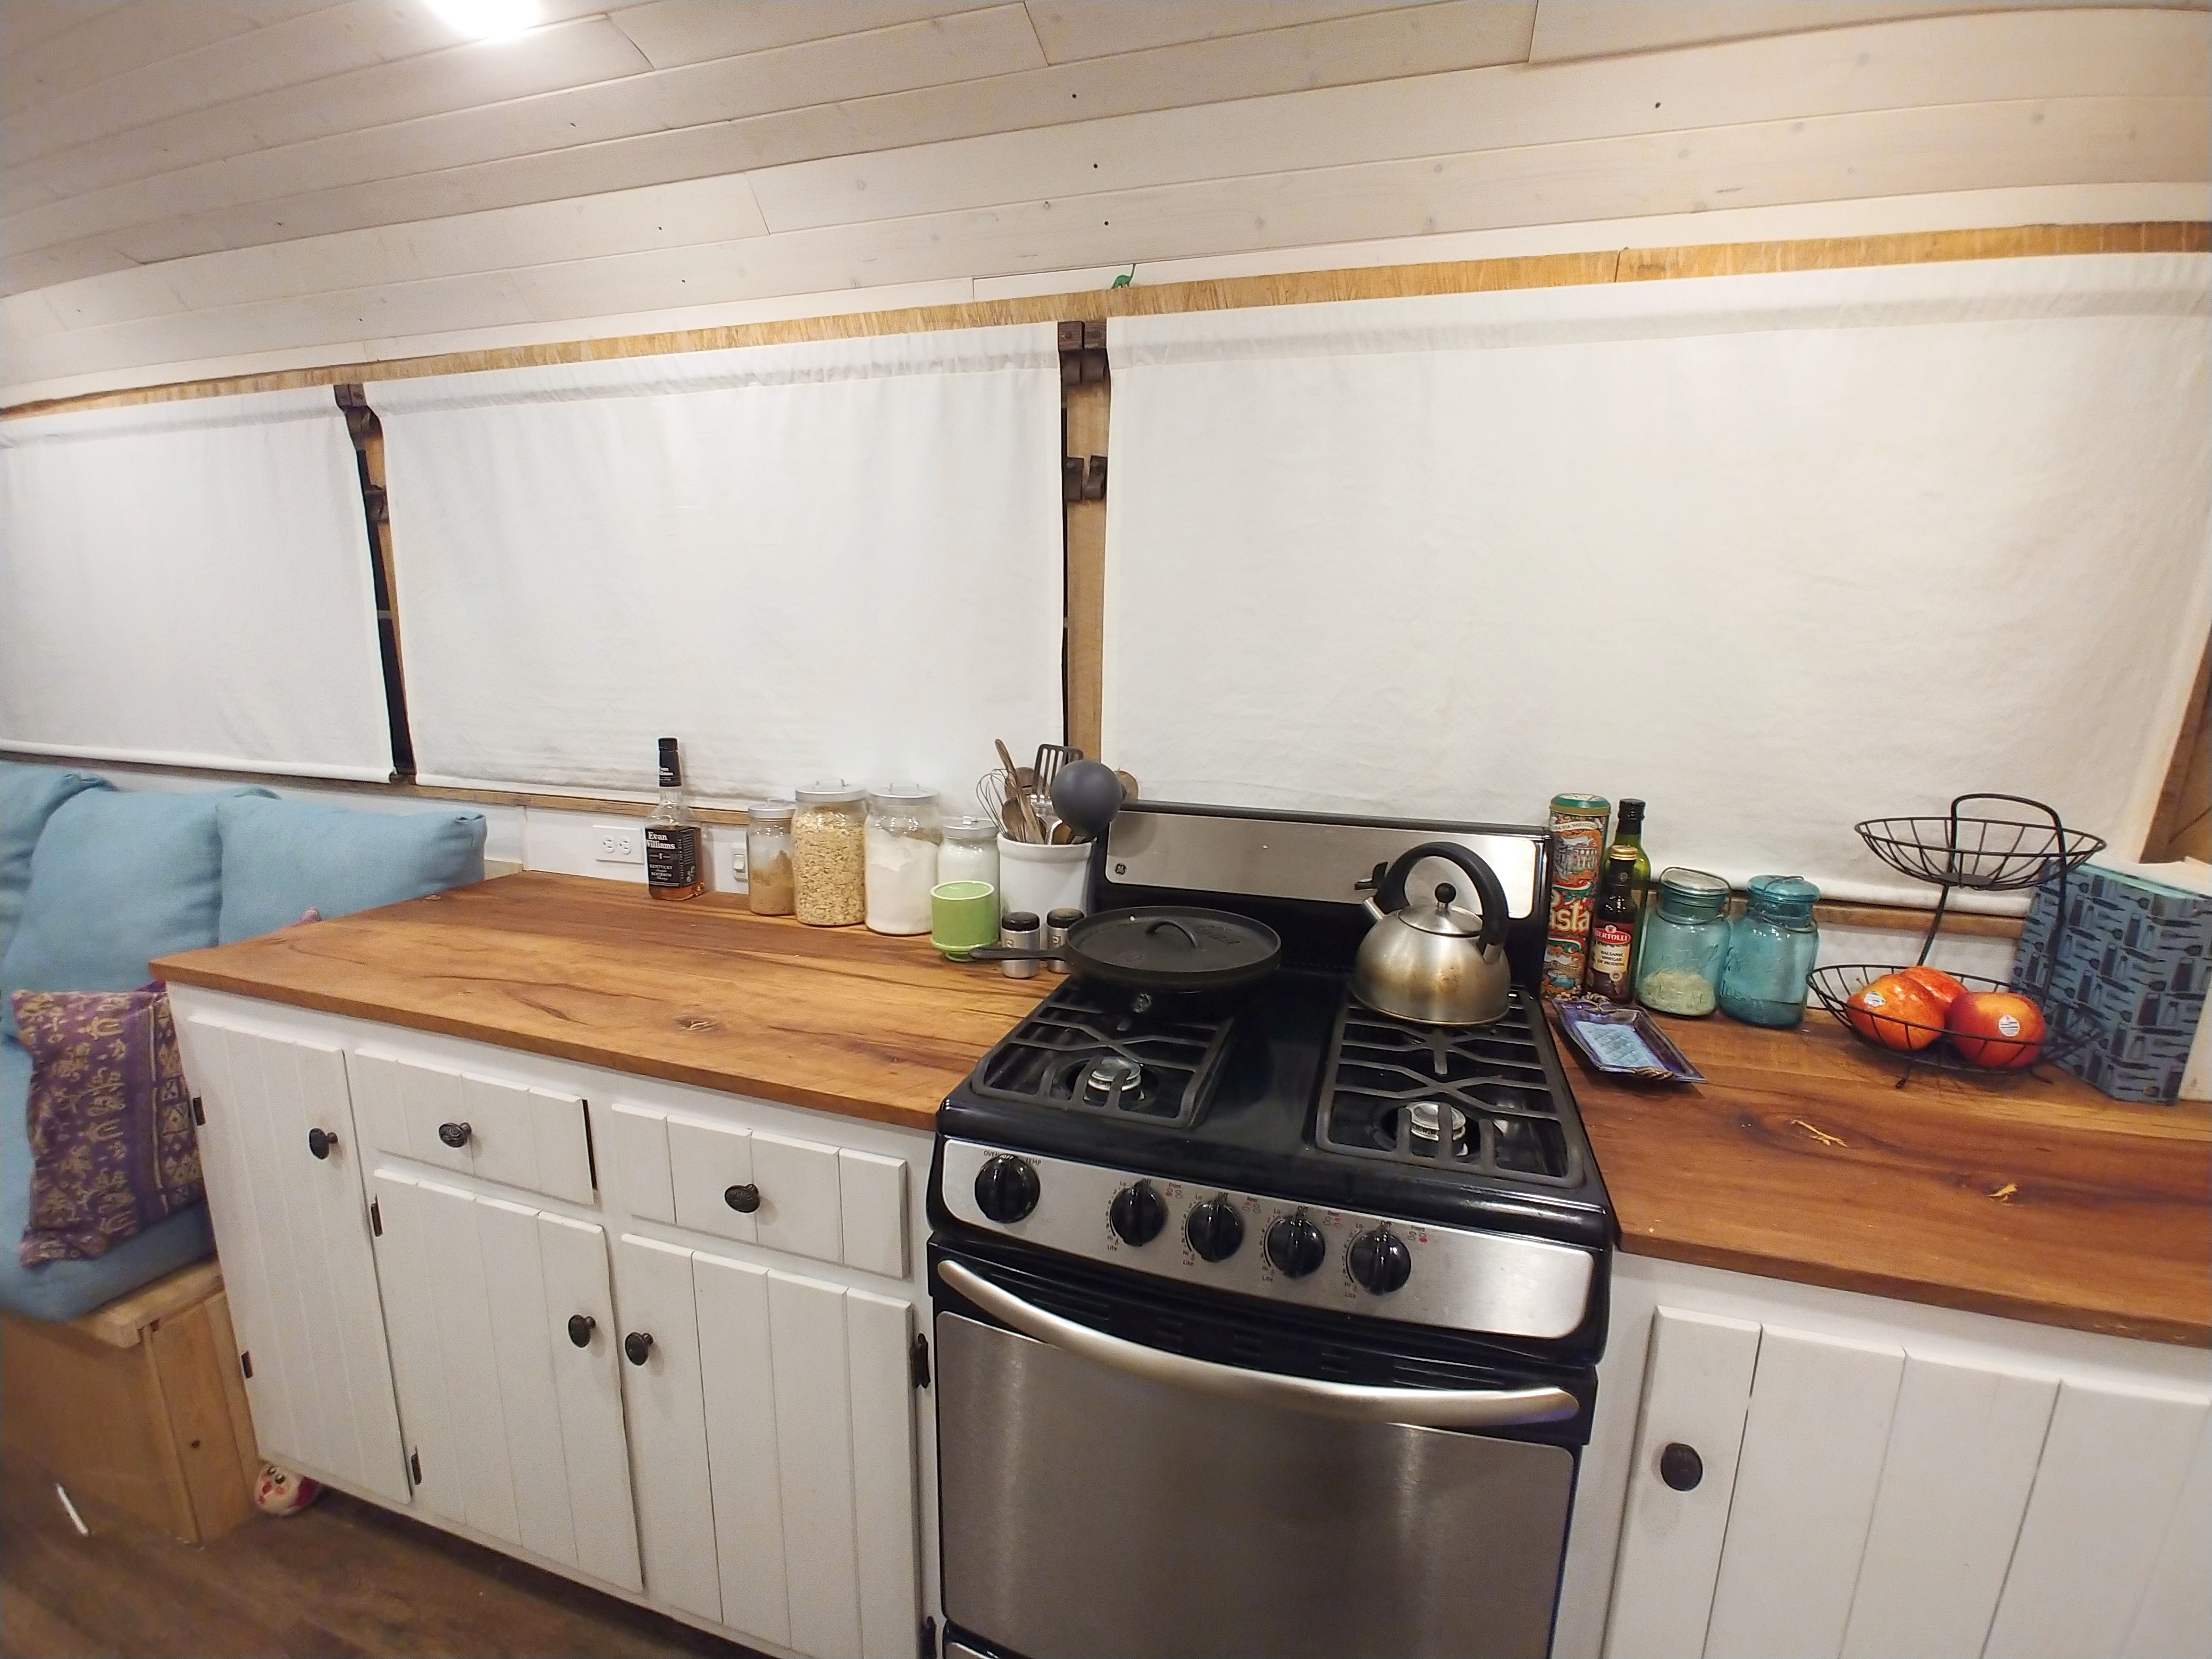
Kitchen Cabinets
We designed the kitchen area to be larger than most RV or bus kitchens. I want to make sure I have plenty of storage for food and kitchen items. I love to cook and bake so I was hoping for plenty of counter space as well. Adam built the cabinets using plywood and lots of pocket screw holes! The kitchen cabinets were planned around cabinet doors my parents were getting rid of when they remodeled their kitchen last year. A few of the doors needed to be cut and modified but you’d never know it. Seeing the kitchen cabinets in place I feel confident we will have plenty of storage and work space in there.
Couches
We framed the couches to get spacing right for the kitchen and left them rough like that for a few months. After making progress on some of the other projects we revisited the couches, building the supports and hinged seats. The storage under the couches will be accessed by lifting the seats. I see storing things like sewing and art supplies here. Also, kids’ school supplies. We still will build slightly angled couch backs then I’ll get some foam or old cushions I can sew covers for to go on the seat and back of the couch.
Vent Fan – Check
Water Inlet – Check
That’s about it. I’d love to promise to update more often but at this point, you wouldn’t believe me anyways! Follow us on instagram @deliberatelifebus
Oh, P.S. We changed our name to Deliberate Life Bus.
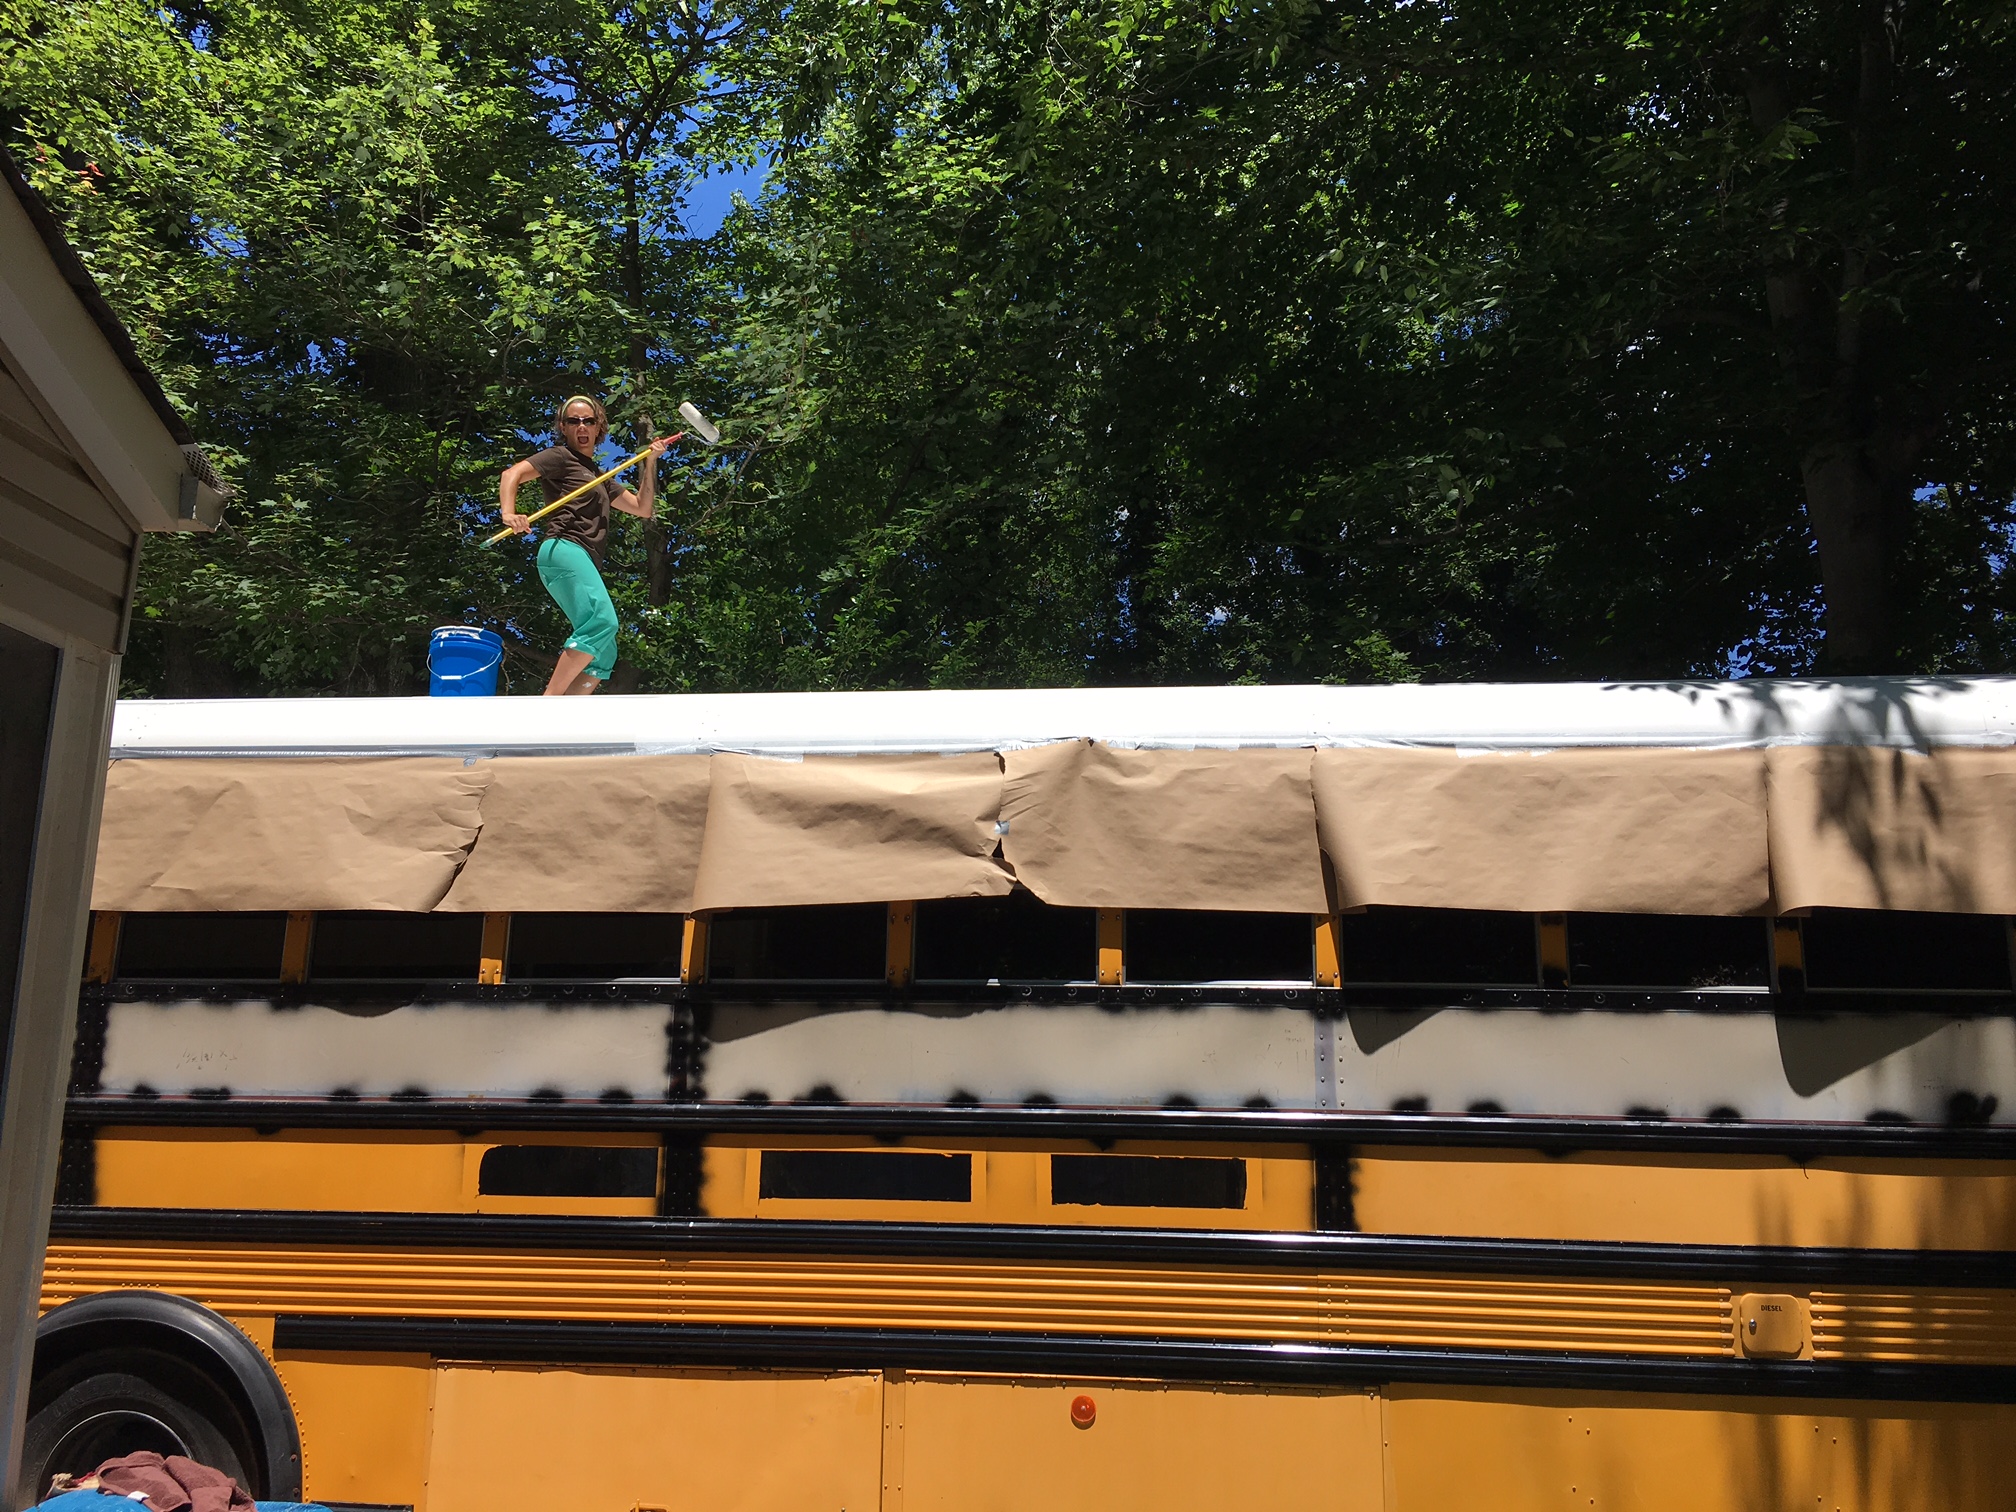
The rack plan is pretty simple by itself but as with everything else, it turns complicated when you get into actually doing it with just the two of us. We had the kids carted off to Nana’s house for a couple day and I was off work as Adam and I made the most of it. We hauled all kinds of stuff up to the roof: all the metal tubing, the feet he had fabricated, welder and welding accessories, drill, bolts, paint, and other small miscellaneous tools. And WATER!!! Did I mention that we live in North Carolina and it’s July meaning 90+ degrees and super humid. Our bus roof gets full sun from about 11 am until 4 pm and it is sweltering.
Because we didn’t have a way to lift the entire rack up to the roof after it was put together and because the placement had to be so precise with the way we were building it, we had to create it on the roof. We measured out the foot placement, lining one hole of each foot up with the edge of a ceiling rib to make sure we were tapping into the strength of those ribs and not putting our rack just on sheet metal. Holes were then drilled. We mocked up the next foot and lined up the square tubing. When all feet were placed we clamped another piec of metal across the bus to get everything square before welding. Then Adam went down the line welding each rail to the feet and then to the next rail to create one long running rail down the roof of the bus.
Next was paint. We laid down paper on the roof of the bus and took the rails back out of their placements. We laid them on the paper and used spray paint primer and then rustoleum spray paint to coat each side of the rails.
Well, I thought the paper covered the roof well enough but when we took it back up we had made stripe of overspray down the center of our beautiful white roof that we had just painted! Aaaaahhh! Moving on…
We applied butyl tape to the base of each foot to give additional protection from water seeping under the feet and potential into the bus. I feel like the amount of water proofing we do on this bus screams “I’m terrified of a drop of liquid entering my bus!” Well, that’s because we are. If we end up with leaks we could end up having to tear out huge portions of our home and replace. That could end up being really expensive and time consuming. So, yes, we are taking many many precautions against leaks. Next we will seal around the feet and each bolt head as another water proofing measure.
Bolted it down, cut off the butyl that got squeezed out and called it a day right? Nope. We had to go back and re-paint those over spray areas. Plus earlier in the day we had discovered some weird bubbling paint on the roof. We decided we couldn’t ignore it so we cut into it and milky water came out. 😬
It appeared that there had been water trapped inside the raised rails that were already part of the bus when we painted. It had leaked out and separated the paint from the bus. So we had to peel off all the paint. Then try to dry things out by spraying the compressed air into tiny cracks. Then sand. Then paint multiple coats of Buskote again. The plan is that we will cut slits in the paint between the rail and the bus on the downhill side to allow any remaining trapped moisture to roll out. Maybe one day we will seal that up but at this point I’m kind of afraid to.
So hot! So much work! But a great result. I’m coming to accept that our roof won’t be a flawless white because there is always if going to be bird poop, leaves falling, pollen, footprints. But it will be functional and waterproof!
Since we last left you we’ve puttered a bit. Sealed screws, a few remaining holes, etc. We also took a two week trip to Utah to go backpacking in the Escalante canyon. It was epic, hard, amazing, gorgeous!
Water
Adam mounted the water tanks to the bus. It’s super important to get these mounted very securely because 110 gallons of water weighs over 900 lbs! Now, we won’t be traveling with those tanks full very often but if we do, they better stay put. In the previous post I showed you the brackets Adam installed that we would mount the tanks to. Now he has built a cradle for them, strapped them down with metal strips covered with recycled bicycle tubes.
Insulation and Electrical
We have now insulated the lower portion of the walls and run electrical conduit for our 120 volt electrical wiring. We have yet to map out the 12 volt system. For the insulation we used the same reclaimed rigid foam that we used in the floor. Last we used great stuff to seal any gaps.
Miscellaneous Stuff
Installed city water and gravity fill inlets
Installed new LED running lights.
Swapped out some colored flasher lenses on the front and rear of the bus so that we have all clear in the front and all red in the back.
removed some unnecessary wiring (we sure hope it was unnecessary!)
Roof Rack
We really sat down to figure out our roof rack. We are at a stand still on running 12 volt wiring fo ceiling lights and insulating the ceiling until we get the roof rack installed. We need to be able to have access to the inside of the roof for bolting it down so there can’t be insulation in the way. We decided on a plan for tillable solar panels on the roof and went to the scrap yard to find materials.
Wren had a blast and found sooo many treasures. Somehow we ended up taking a giant light bulb home with us. She toted the 5 lb bulb all over the scrap yard then put it down for a nap when we got home.
The rack will sit on an angle because of the roof’s curve so we worked out the correct angle and height needed for the feet so the side rails will clear the center height of the bus. Using less than ideal tools, Adam got the angles cut and welded the feet to them. We also purchased long pieces of this same square tubing to serve as running rails. The feet will be bolted through the roof and ribs every 4 feet then the side rails will be welded to the top of the feet tubes.
Roof Paint
Building a bus (or any big project beyond your comfort zone) involves a lot of figuring out order of steps. We decided that we wanted to have the roof painted before installing the roof rack so that we didn’t have so many little bits to paint around. We also felt like having a solid painted surface would give us the best waterproof seal. After installing the rack we will re-seal around the rack’s feet. Here is the roof all sealed and washed and ready to get painted.
Not so pretty but she is beautiful to us because of all the hard work and steep learning curves that went in to making his happen! We taped with painters tape around the area we wanted to paint then taped brown paper up as well to catch any over painting or drips.
We used Bus Kote from Hytech to paint the roof. This stuff is designed to insulate and seal stuff up nice and waterproof. There was a lot of painting in the full sun (late June in North Carolina)! Before painting we had to wear shoes to stand on the roof. It was so hot even though it was already white. After only one thin coat of Bus Kote, we could comfortable stand of the roof with bare feet. We checked out the feel of the metal roof on the inside of the bus as well. It was a difference of hot metal on one had (where we had not painted) and kinda warm metal on the other (where we had a coat done). Pretty great!
We rolled on the first three coats in one day. They went on thinner than we expected and dried nice and fast. After a day in the sun painting I needed a shower. As I closed my eyes I felt like I was still on the rocking roof of the bus and found myself standing in a way to have very sturdy balance! It was just like how you feel after a day of swimming in the ocean and you lay down and still feel you are floating in the waves.
Today we moved the bus into the road for the final coat of white followed by the clear protective coat. We wanted to make sure our trees (or birds!) didn’t drop anything into the wet paint.
I was nervous about what the neighbors would think (I mean we already are the family with a school bus in our yard, chickens, rabbits, and an unkempt front yard that is turning into an overgrown mini forest). So I posted a note on the bus that would hopefully make concerned neighbors think we were super nice and considerate.
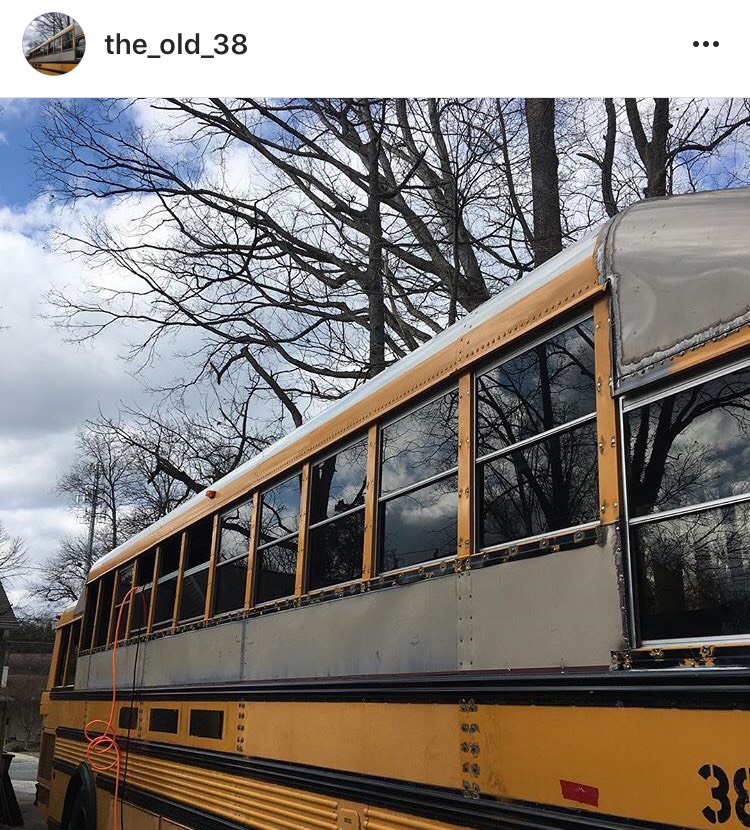
As we were just about finished, a cop pulled up in an unmarked car. I kept rolling on paint as he sat in his car and I worried about what the damage would be in tickets and fines. Turns out he was looking for our neighbor who wasn’t home. He asked if we were converting the bus and Adam told him about our plans and showed him the inside of the bus. Whew! We finished our clear coat, removed the tape, and pulled the bus back in the yard all without incident. Here is a picture of the pristine roof.
Just look at that beauty! Look at those lines! Quite a difference from before in cleanliness and temperature. I can’t wait to see how good she looks when we get her all painted! But that is a looooong way off.
Here is our up to date progress on the last to-do list PLUS more work we have done:
Side door fabrication – DONE
After the raise, we had a taller door frame so we had to extend the door to fit. Adam cut the door in half on the lower portion. This exposed the interior square tubing that framed the door. He bought solid square stock that just fit into the hollow tubing in the door. He inserted it it 14″ into the tubing on either side then drilled 3/8″ holes in both the tubing and stock and plug welded it together leaving a 14″ gap in the pieced of the door making the door the height we needed. We used yet more leftover sheet metal ceiling panels to cover the gap in the door. We reinstalled the hinges (a bit tricky with new holes and difficult access areas inside the bus), and mounted the door back on the bus. We are currently working on creating a good seal with a combination of wood framing and foam weather stripping.
Patch holes in ceiling – close to DONE
We removed both of the emergency exits and replaced them with sheet metal (you guessed it, from the old ceiling panels!) We welded in the first one which was tricky as welding sheet metal together always is. The second one we used rivets with lap sealant. This was absolutely the better method.
We have been looking for and marking leaks with each rain storm. There are only two small leaks in the ceiling remaining to be fixed.
Pound a couple more rivets – DONE
Sure. I suppose we did this. I bucked a lot of rivets.
Seal all screws – Sorta DONE
We haven’t done this yet but after multiple rains we have no leaks here. We may seal these on the exterior before painting.
FINALLY put windows back in with fresh seals for a waterproof bus! – DONE
This step is one I have been waiting on for so long. I’m not sure what it is about having the windows in but it makes me feel like we have a potential home and not just a frame of metal in our yard. We applied butyl tape to the bottom of the frame and stuck each window in. After screwing the frames back into place I went through and cut off excess butyl tape on the exterior of the bus. Then we sealed all four sides of each window with clear polyurethane sealant. So far we have only done this on the exterior. We are looking for leaks and once we are sure there are none coming from the exterior we will seal the interior side of the window frames.
Isn’t she beautiful?! This picture is a screenshot from instagram so if you are interested in following us there its @the_old_38 and we update way more frequently, just not in as much detail.
What else?
Painted floor
We cleaned up any rust (there wasn’t much) and painted the floor. Then we got to do the other thing I’ve been waiting forever to do; tape out a floor plan! It was pretty cool to see our floor plan in real life size. We made a few adjustments based on window spacing and comfortable living space. We were also able to start planning plumbing and wiring since we have finalized the floor plan now.
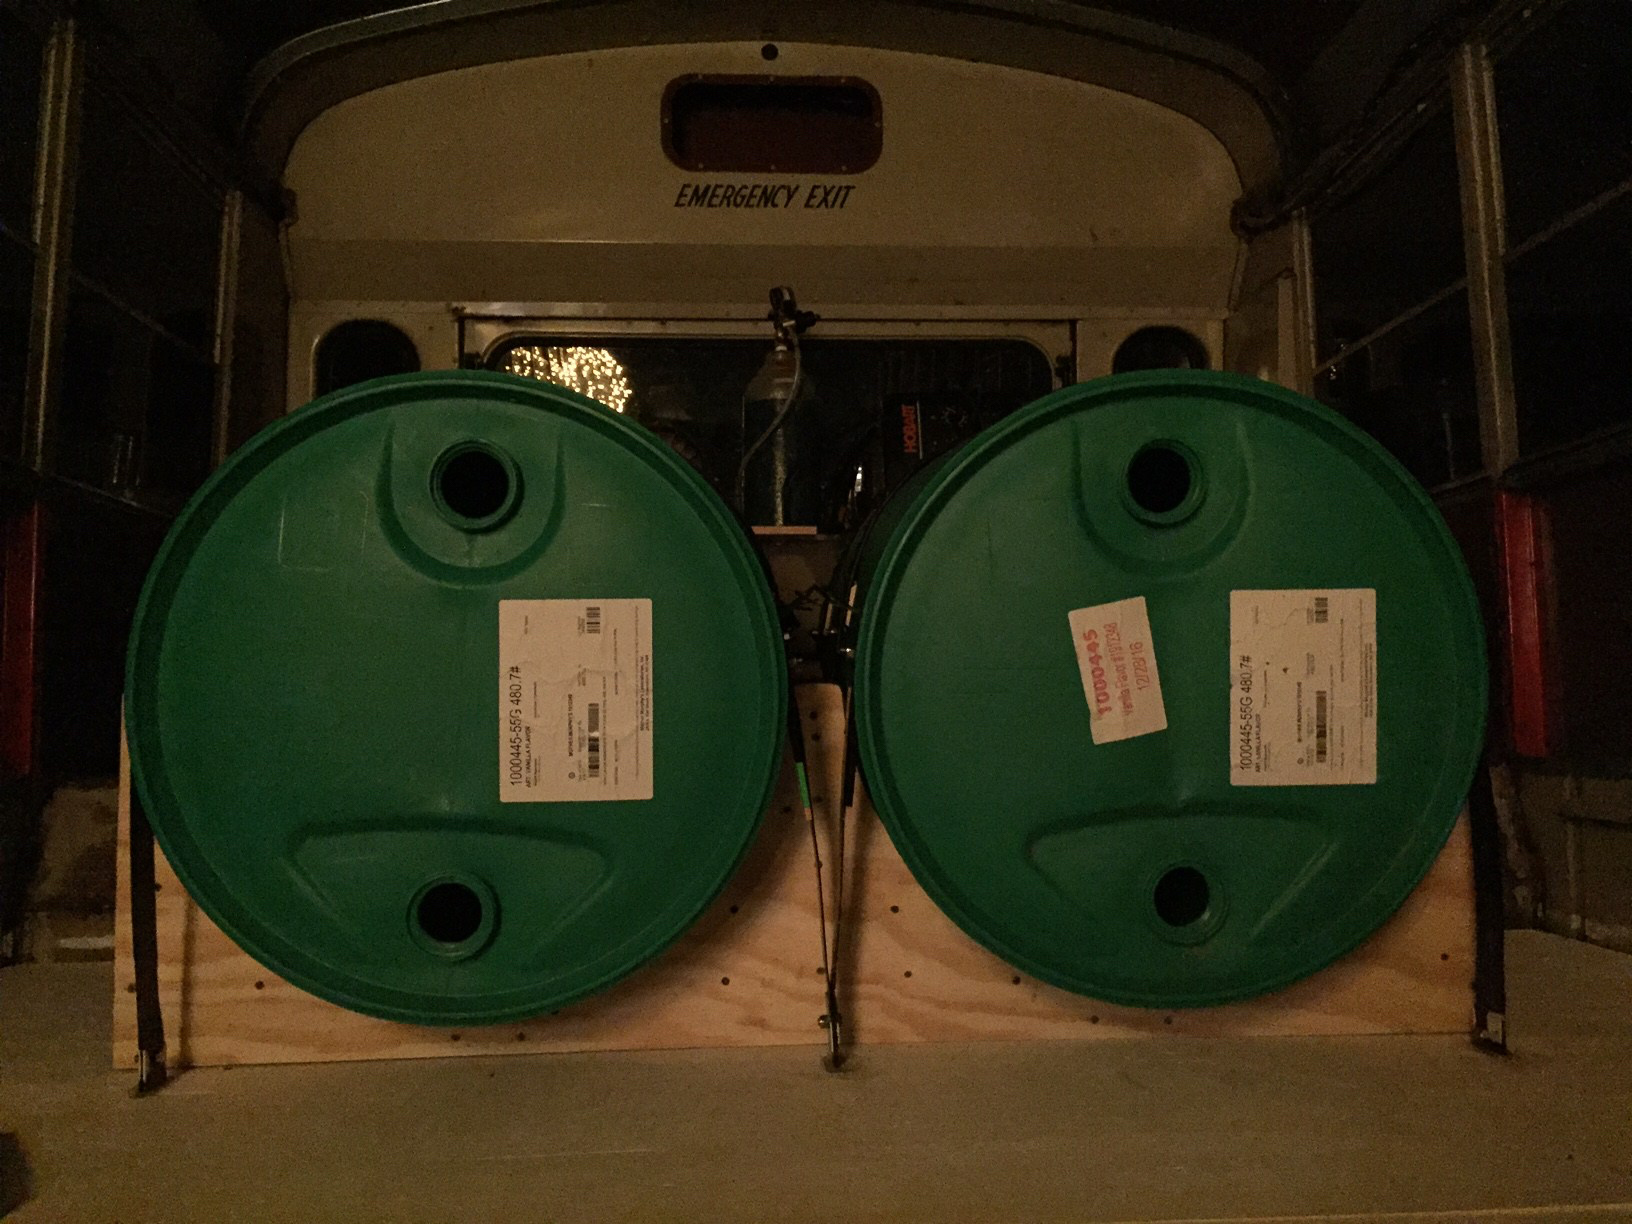
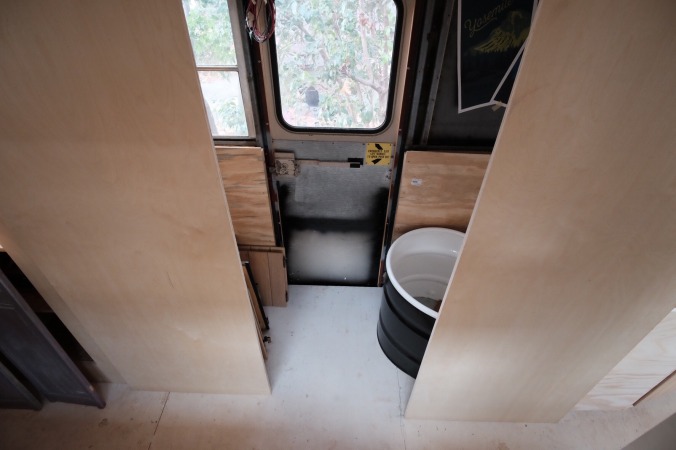
Fresh Water
We decided to use two 55 gallon drums for our fresh water tanks. Sure, they will be much harder to mount but they were $15 each and the costs of this bus are piling up quickly. They will be mounted under our master bed. Adam created a bracing system that he has bolted through the bus to spread the load over the floor (so the sloshing water tanks don’t rip the bolt through the metal of the bus floor.) The uprights in this system will allow us to tie down the tanks with hurricane straps or metal strapping. We will get to that later. We also plan to build plywood supports to cradle the drums for support and keep them at a slight downward tilt so the water runs to the front.
We have been spending money like crazy it seems. We bought our hot water heater (Eccotemp L10 tankless) and our water pump (SureFlo 4008). We also have ordered parts to allow us to plumb through the bung holes of the water drums. Some pex and a few other parts and we will be ready to run plumbing!
Insulation
In an ideal world I would spray foam this whole bus and it would be ah-mazing! But that’s multiple thousands of dollars. So. We sourced some reclaimed or seconds (couldn’t really get a clear answer on this) rigid foam insulation. This is what we are using in our floor and walls. We bought a whole pallet of it for $80 and have used less than half in the floor. Adam and I debated on whether to frame the floor or just lay the subfloor on top of the insulation. In the end we framed the floor for two reasons: 1. extra support for the approximately 850 lbs of water and 2. the insulation we got was not consistent in thickness so the framing will ensure we have a level floor.
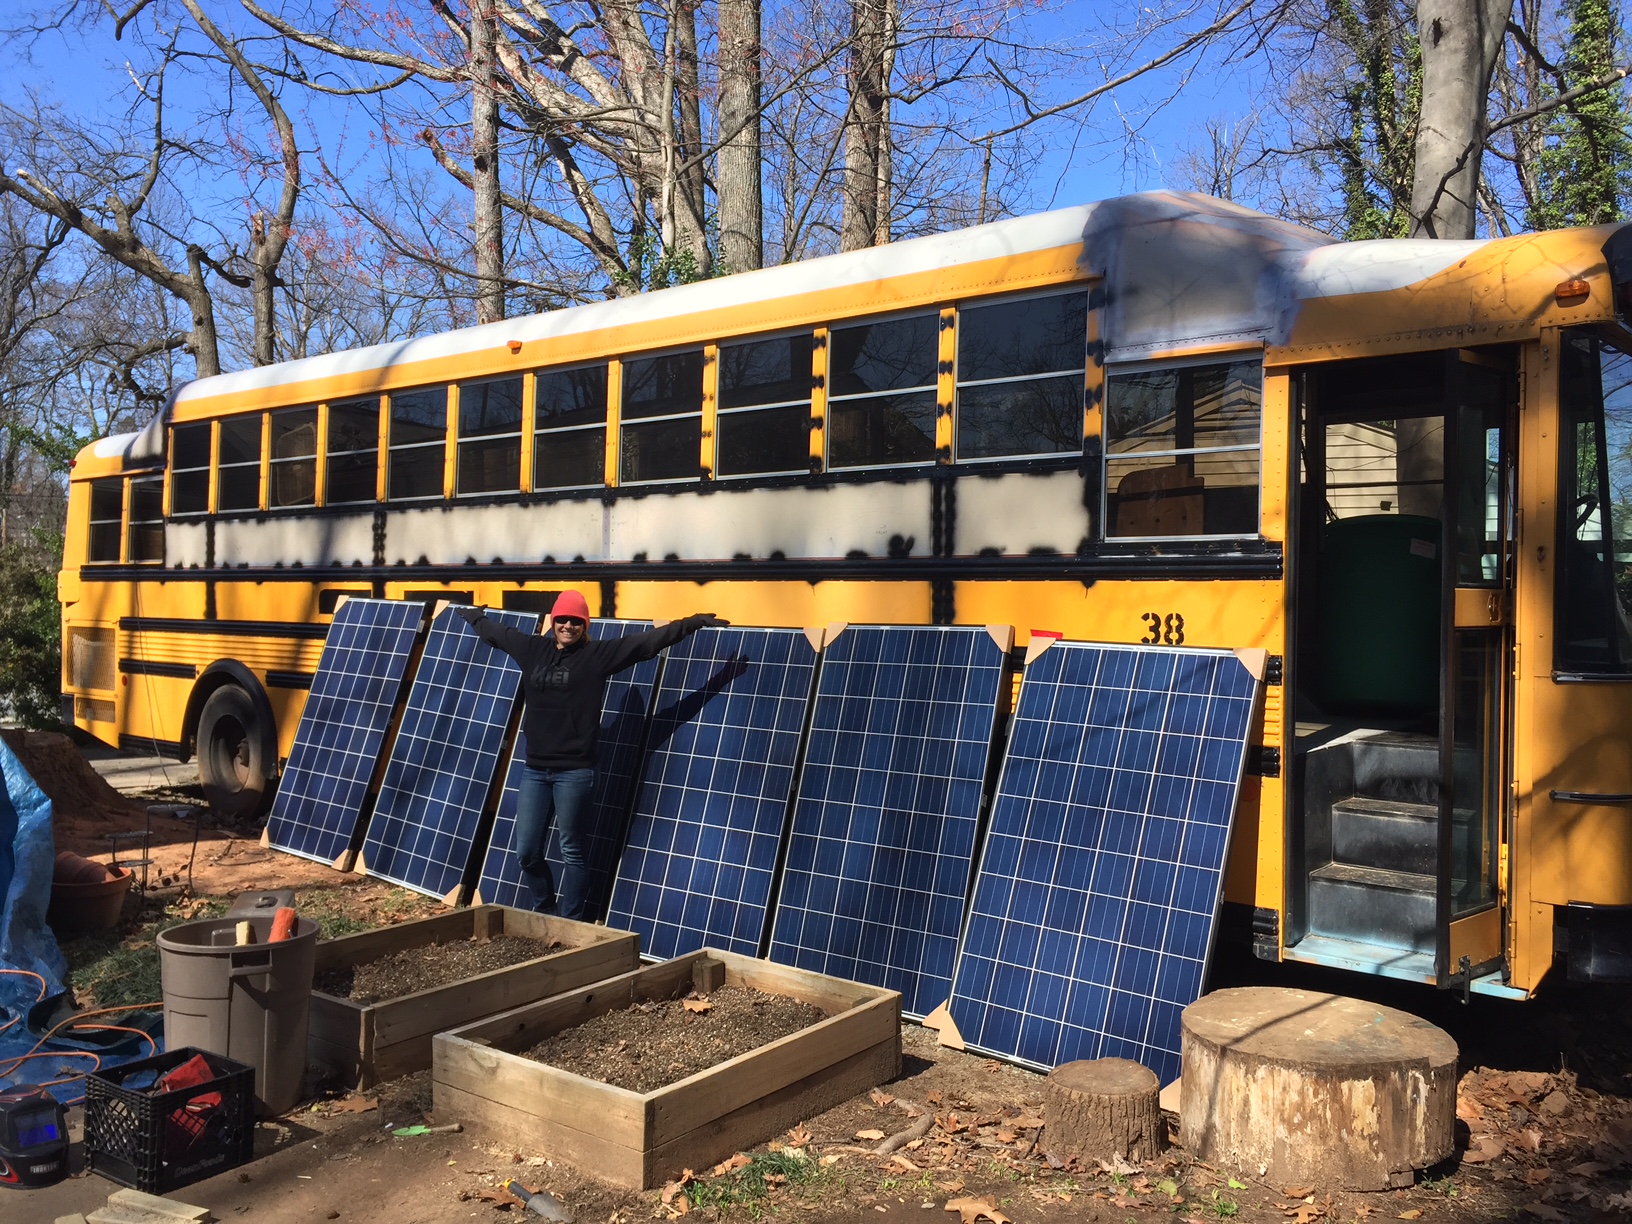
Solar
Here’s another place our money went recently. Adam schooled me in solar system design (sounds heavenly haha!) so I could carry on conversation and help make decisions on what we wanted to purchase for our bus. We found a good price on some panels that were the right size for our bus and planned system. We bought 1500 watts of solar! 6 panels of 250 watts each from a Chinese manufacturer (Trina). It ended up being about $0.60 a watt including shipping to our house. These will sit for a while in our entry room/bus parts room as we plan the rest of the system and save up to buy the inverter, charge controller, batteries and other components.
Why such a big system? We will be living in our bus full time. It will be our home. So we want to be comfortable taking hot showers (of course shorter than in a house), running an AC on the hottest days, having a regular refrigerator, watching TV, and charging our devices. We know there will be a big change in our awareness of our power consumption and when we choose to consume but we want to set ourselves up for long term success with enough power since our goal is to go without a generator.
A lot has been done and there is a lot left to do but I feel we have some momentum right now so I hope we can keep that going.
Camp out in the bus
Once the floor was cleanish, we had a family camp out in the bus!
Stuff about us (so you know we are just like you and its not all rainbows and unicorns)
Adam is the primary one working on the bus and is doing 80% of the work. He is also the stay at home parent who takes care the kids and the majority of the housework. I wish I could help out more but I work odd hours at a full time job so our free time doesn’t align that often. I have also been spending a lot of my free time lately getting us ready for a big adventure in Utah. As with any couple who embarks on a big DIY project, it causes some tension. Maybe it’s mostly me feeling guilty for not having enough time for Adam, the kids, the bus, the house, etc. When I’m home and Adam wants to work on the bus but I want to bake bread or clean the house or whatever domestic thing I’m interested in doing, that makes both of us feel like I’m not helping with the bus. We both have to continually remind ourselves that we are each contributing constantly to the bus and our family in different ways.


 We made final decisions about placement of the kids bunk and master bed and framed them out. The master bed had to be positioned so that the water coming into the bus could feed downhill into the tanks underneath. After framing we wanted to make sure we could use as much of the under bed areas as possible. They won’t be super accessible but we are thinking that we will store our backpacking and climbing gear in the large deep areas.
 We created a hinged plywood platform for the bed which will allow us to get into both sides of the storage without having to pick up the entire mattress. I sewed a hanging fabric storage system to utilize the shallow space above the water tanks for smaller items. I was able to use all re-purposed fabric from a store called Reconsidered Goods in Greensboro, NC. They have given us the ability to save money and buy used on many things for the bus, Christmas gifts, school supplies, etc. If you are local, check them out at

 Once I saw the closets in place with their shelves I could really picture living in the bus. Now I know that there will be plenty of storage. This picture doesn’t have the best light but it shows one of the closets. The shelves go from floor to ceiling. We tried to find a way to use the doors we got from my parents’ kitchen remodel for the closets but it was just creating weird shapes. With such a small space, I knew I wanted it to be clean and consistent in appearance. We found some old closet doors at Habitat ReStore that were light weight, not too thick, and the perfect size to create closet doors. We won’t install the doors until I paint the interior of the closets so I haven’t yet seen them in place.
 totally dry, Adam had our brother in law help him lift it down to the ground (Thanks Justin!) He cut a piece of cement board, mortared it to the ground, then mortared the concrete slab to the board. We stained the hearth black and used a water based stain to avoid the chemicals and clean up involved in acid stains. I sprayed on the stain with a dollar store squirt bottle. I ordered the stain on Amazon. The brand was Marshalltown but when I received it, the stain was branded as Butterfield Color. Either way, it turned out well and went a long way. I used only a tiny portion of the 4 oz. bottle. I then sealed the hearth with a couple thin coats of GhostShield Cryli-tek 5500 concrete sealer. Again, I used the tiniest portion of the 16 oz. sample bottle I bought. This stuff goes a long way!